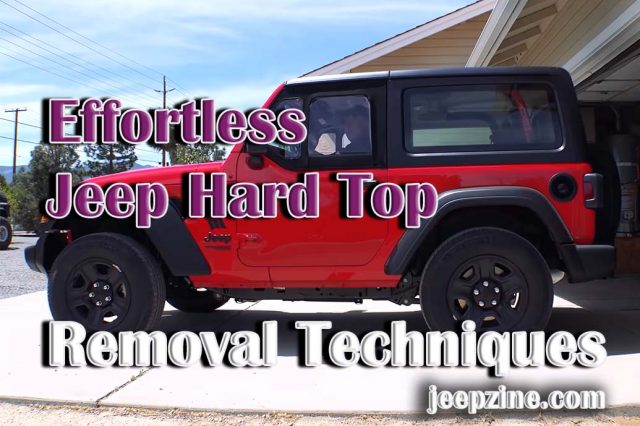
Effortless Jeep Hard Top Removal Techniques
Removing the hard top from a Jeep Wrangler need not be an intimidating task. With the proper approach and tools, it can be done efficiently, allowing you to transform your vehicle for seasonal or recreational needs. This guide outlines essential techniques and safety tips to ensure a smooth removal process, ...
Ground Clearance: A Comprehensive Guide for Enhanced Vehicle Performance
Ground clearance is a critical vehicle specification affecting off-road capability, undercarriage protection, and overall performance. This article delves into its importance, measurement techniques, and the optimal clearance for different driving conditions. Ground clearance is the minimum distance between the lowest part of a vehicle's chassis and the ground, essential for ...

Jeep Wrangler vs Toyota Tacoma: Which Reigns Supreme Off-Road
This article examines the Jeep Wrangler and Toyota Tacoma, focusing on their off-road prowess, engine performance, interior features, and overall value to determine which model stands out as the better option for off-road enthusiasts. The Jeep Wrangler and Toyota Tacoma are iconic in the realm of off-road vehicles, each boasting ...
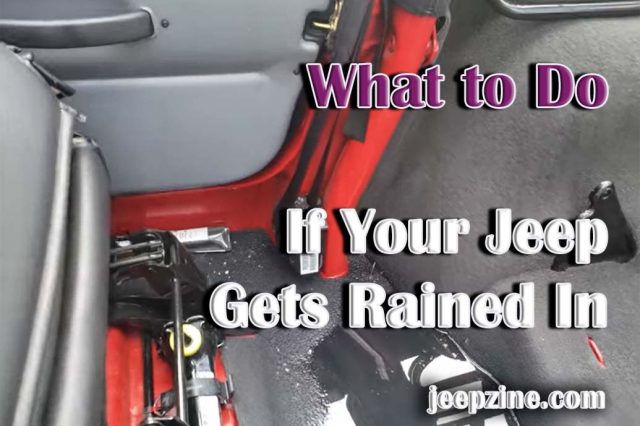
What to Do If Your Jeep Gets Rained In
When your Jeep gets rained in, it can cause significant concern. Although Jeeps are renowned for their ruggedness and ability to navigate tough terrains, they are not inherently built to handle large amounts of water entering the cabin. Such situations, if not addressed promptly, can lead to serious issues such ...
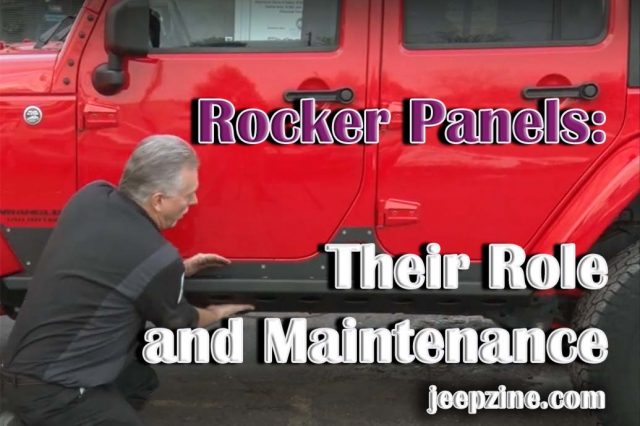
Rocker Panels: Their Role and Maintenance
A rocker panel is an essential component of a vehicle's body, located along the sides between the front and rear wheel well openings just beneath the doors. This structural feature not only enhances the vehicle’s aesthetic appeal but also significantly contributes to its overall strength and stiffness, playing a vital ...
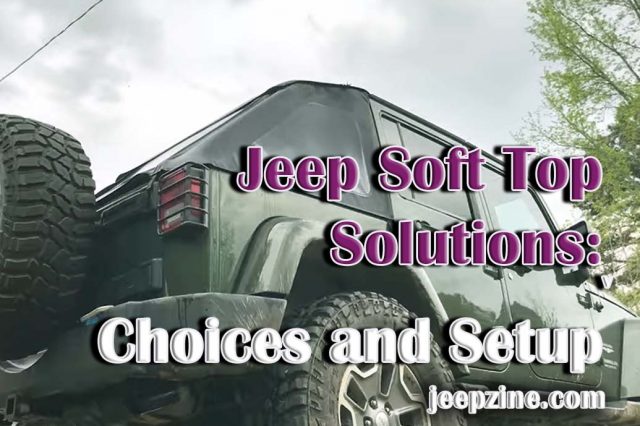
Exploring Jeep Soft Top Solutions: Choices and Setup
Jeep soft tops offer a unique blend of practicality and enjoyment, allowing owners to experience the thrill of open-air driving without sacrificing protection from the elements. These tops are especially popular among Jeep enthusiasts who appreciate their easy removal and installation, which facilitates a quick transition from a closed vehicle ...
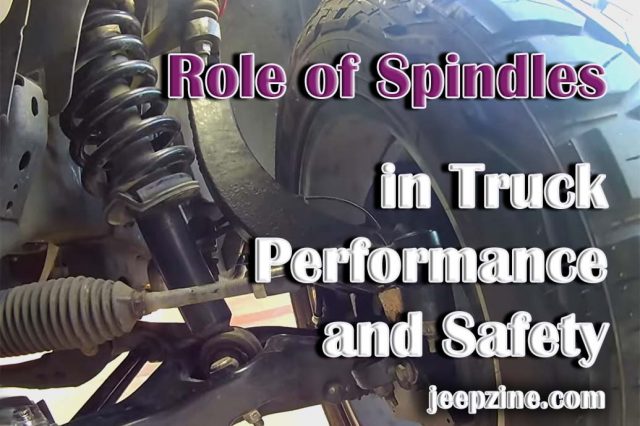
The Integral Role of Spindles in Truck Performance and Safety
Spindles are integral components that contribute significantly to the overall functionality, safety, and performance of trucks. These essential parts act as the pivotal linkage between the vehicle's wheel assembly and suspension system. Developing a comprehensive understanding of what spindles are on a truck, their function, and their importance is paramount ...
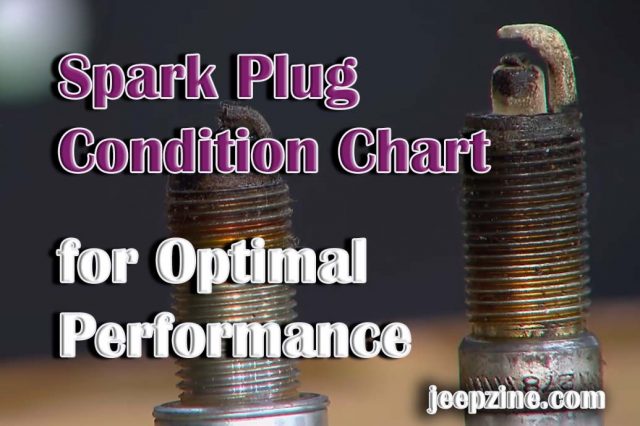
Mastering the Spark Plug Condition Chart for Optimal Engine Performance
Spark plugs serve as critical indicators of your engine's health, functioning as the primary interface for combustion in your vehicle. These small but mighty components can tell you a lot about the internal workings of your engine, from identifying optimal operation conditions to signaling various engine troubles. The spark plug ...
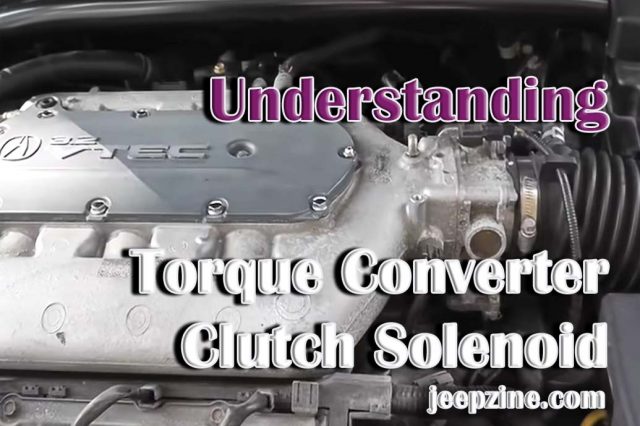
Understanding the Torque Converter Clutch Solenoid
The torque converter clutch solenoid is an important component that helps the transmission in your vehicle operate efficiently. This part controls the flow of transmission fluid to engage or disengage the clutch inside the torque converter. Properly managing this fluid flow impacts your vehicle's acceleration, fuel economy, and overall driving ...
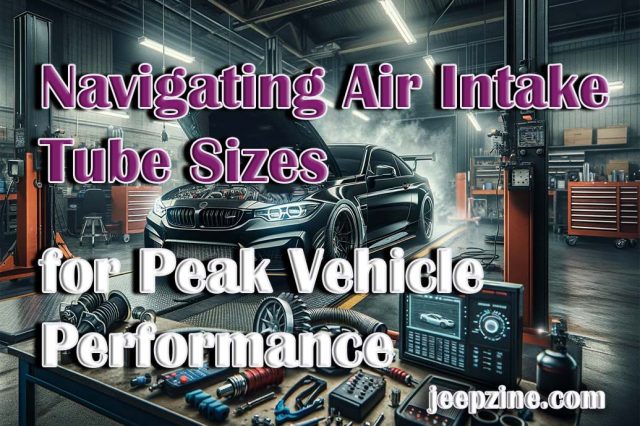
Navigating Air Intake Tube Sizes for Peak Vehicle Performance
This comprehensive guide delves into the critical considerations for selecting the appropriate air intake tube size for your vehicle, aimed at enhancing performance, fuel economy, and overall efficiency. Understanding the pivotal role of air intake systems, this article navigates through the mechanics, benefits, and types of air intake systems, providing ...

The High-Flow Catalytic Converter Explained
High-flow catalytic converters are an upgrade over standard catalytic converters, designed to reduce exhaust backpressure and enhance the flow of exhaust gases. This improvement is crucial for vehicles with modified engines seeking increased power output and efficiency. By optimizing the flow of exhaust gases, these converters play a vital role ...
How to Change Strut Mount: A DIY Approach
Strut mounts are not just any component in your vehicle; they are the silent heroes that bear the brunt of road irregularities, ensuring you enjoy a smooth ride. Positioned at the top of the vehicle's strut assemblies, these mounts serve as the main pivot points for the steering system and ...
Faulty Pickup Coil Symptoms: A Comprehensive Guide
The ignition system of a vehicle, integral to its operation, hinges on the health of its components, with the pickup coil playing a pivotal role. This seemingly modest part is responsible for igniting the engine, setting the stage for a smooth ride. However, when it falters, the symptoms are unmistakable, ...

Navigating the Issue of a Broken Air Intake Resonator
The air intake resonator, a key component in your vehicle's engine, plays a pivotal role in reducing noise from the air intake process and assisting in the smooth flow of air to the engine. Serving more than just a noise-cancelling function, it contributes significantly to the engine's efficiency and overall ...
Are the Front and Back Rotors the Same?
Brake rotors are an integral part of a vehicle's braking system, serving as the contact point for brake pads to slow or stop the vehicle. They come into action when the brake pedal is pressed, causing hydraulic pressure to compress the brake pads against the rotors. Despite performing similar functions, ...
Step-by-Step Guide to Replacing a Stud on a Wheel Hub
Over time, the studs on your vehicle's wheel hub can become damaged or break due to various reasons, such as corrosion, impact, or improper installation. Replacing a damaged stud is crucial to ensure the proper fitment and safe operation of your vehicle's wheels. This article will guide you through the ...
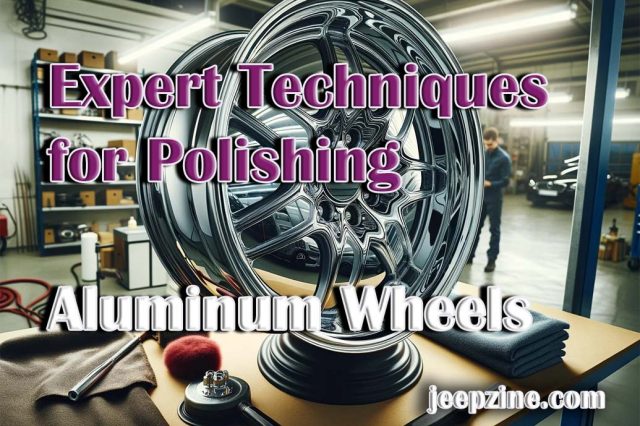
Expert Techniques for Polishing Aluminum Wheels
Aluminum wheels are a popular choice for vehicle owners seeking both performance and style. However, over time, they can lose their lustrous finish due to factors like oxidation and brake dust accumulation. This comprehensive guide will provide you with the knowledge and steps required to restore and maintain the original ...
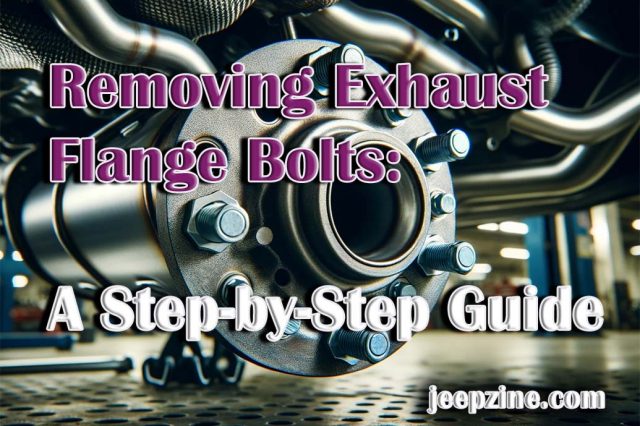
Removing Exhaust Flange Bolts: A Step-by-Step Guide
Removing exhaust flange bolts is a task that many automotive enthusiasts and DIYers dread. These bolts, which secure the exhaust system to the engine or catalytic converter, are subjected to extreme heat cycles, vibrations, and corrosive elements, making them prone to seizing and becoming incredibly difficult to remove. However, with ...
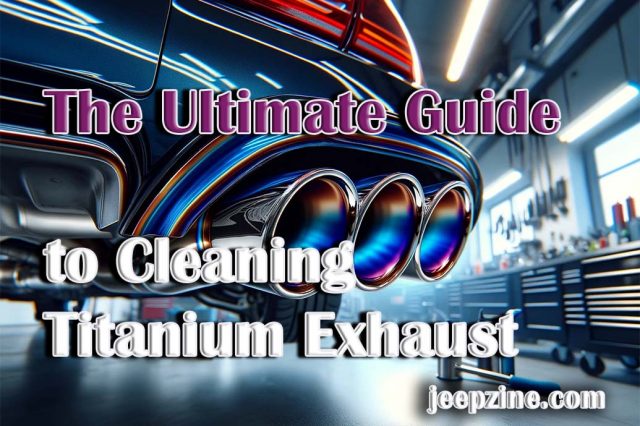
The Ultimate Guide to Cleaning Titanium Exhaust Systems
Titanium exhaust systems stand out in the automotive world for their exceptional strength-to-weight ratio, resistance to corrosion, and ability to withstand high temperatures without deteriorating. Chosen for high-performance and racing vehicles, these systems offer a distinct advantage by reducing overall weight, thus enhancing vehicle speed and efficiency. Beyond performance benefits, ...

How to Turn Off Theft System
Modern vehicles come equipped with advanced anti-theft systems that sound an alarm if someone attempts to break into your car. While this can be useful for deterring potential thieves, it can also be triggered accidentally and become a nuisance. Fortunately, temporarily turning off your car's alarm system is relatively straightforward ...
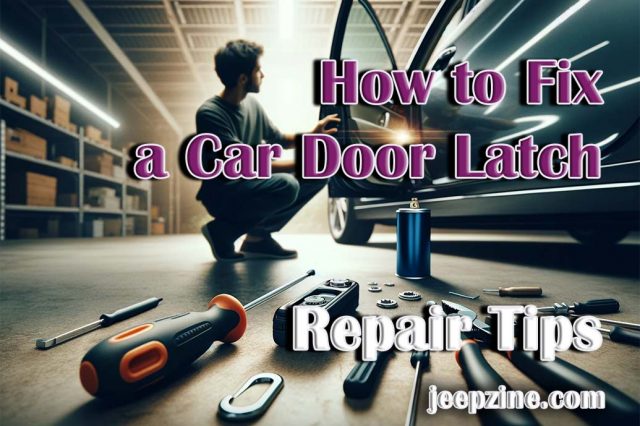
How to Fix a Car Door Latch – Repair Tips
The functionality of a car door latch is something most people take for granted until they encounter a problem. These mechanisms are pivotal not only for the convenience of entering and exiting the vehicle but also for the safety and security of those inside. A malfunctioning car door latch can ...

How to Clean Car Battery Corrosion: Your Complete Guide
The battery in your car is an essential element that enables your vehicle to ignite and supplies energy to various other accessories. However, over time, the battery terminals may develop corrosion due to chemical reactions involving battery acid. This corrosion can compromise the performance of your car and even prevent ...

What Stereo Fits My Car: Finding Your Perfect Match
Embarking on the quest to upgrade your car's stereo system is an exciting venture that promises to enhance your auditory experience while driving. This upgrade goes beyond just elevating sound quality; it's about infusing your vehicle with the latest in audio technology, thereby transforming every journey into an immersive experience ...
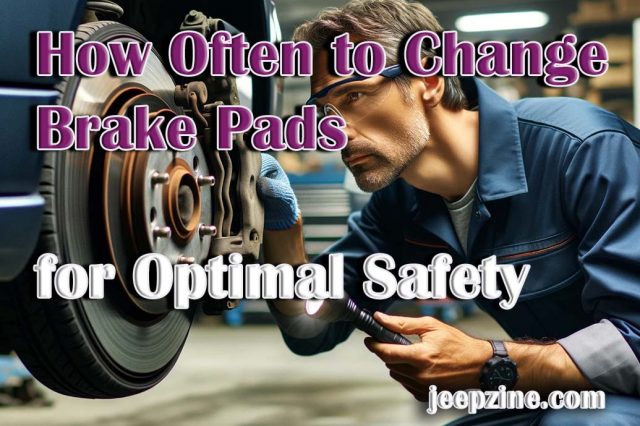
How Often to Change Brake Pads for Optimal Safety
Brake pads are essential for the safety and efficiency of your vehicle's braking system, acting as the crucial interface between the brake caliper and the rotors to create the friction needed to reduce your vehicle's speed. Over time, this constant friction causes brake pads to wear down, diminishing their ability ...
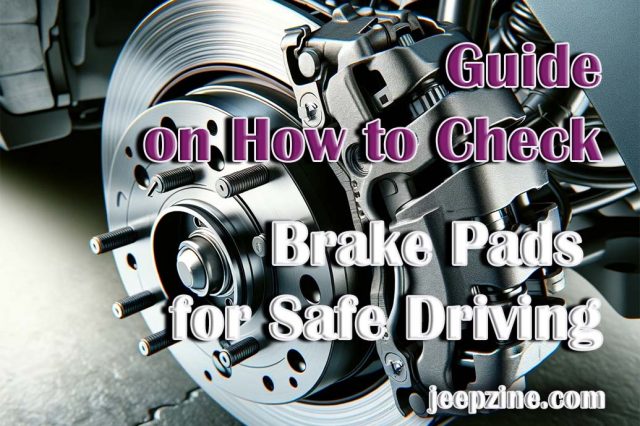
Essential Guide on How to Check Brake Pads for Safe Driving
Maintaining your vehicle's brake pads is essential for ensuring safety on the road. The brake system is a critical component of any vehicle, allowing drivers to stop effectively and avoid potential hazards. Regularly checking your brake pads for signs of wear is a vital part of vehicle maintenance that can ...
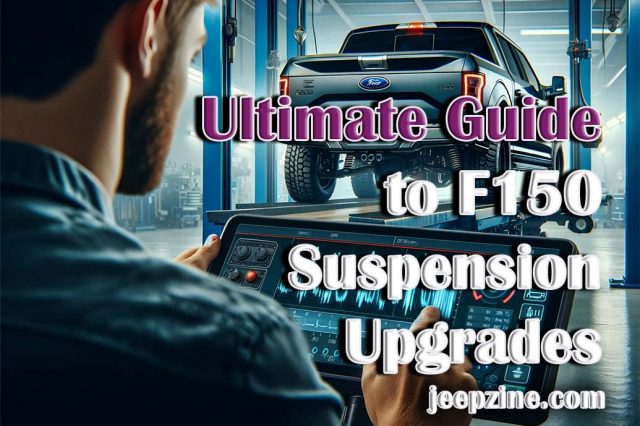
Ultimate Guide to F150 Suspension Upgrades
Embarking on an F150 suspension upgrade journey marks the beginning of a significant transformation in your vehicle’s performance, handling, and overall driving experience. The suspension system, the unsung hero of your vehicle's stability and comfort, plays a pivotal role in absorbing the inconsistencies of the road, enhancing stability, and ensuring ...
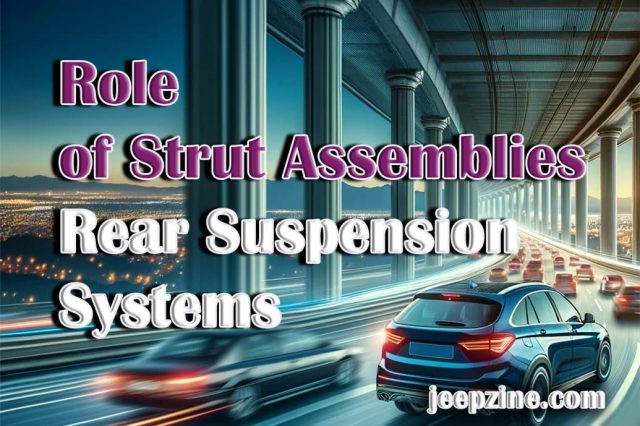
Understanding the Role of Strut Assemblies in Rear Suspension Systems
Strut assemblies are integral to the suspension system of a vehicle, playing a pivotal role in ensuring stability, handling, and comfort. Specifically, when it comes to the rear of the vehicle, the question of "do strut assemblies work on rear?" is met with a definitive yes. Rear strut assemblies work ...
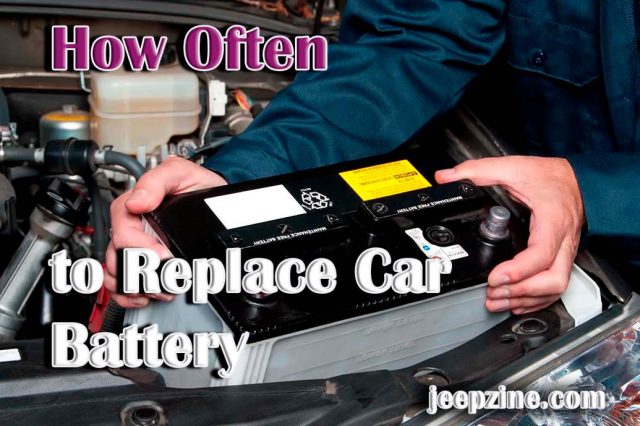
How Often to Replace Car Battery
The lifespan of your vehicle is significantly influenced by the quality and condition of its components, none more so than your car battery. A key player in ensuring smooth rides and uninterrupted journeys, the car battery is a component you simply cannot afford to neglect. In this article about how ...
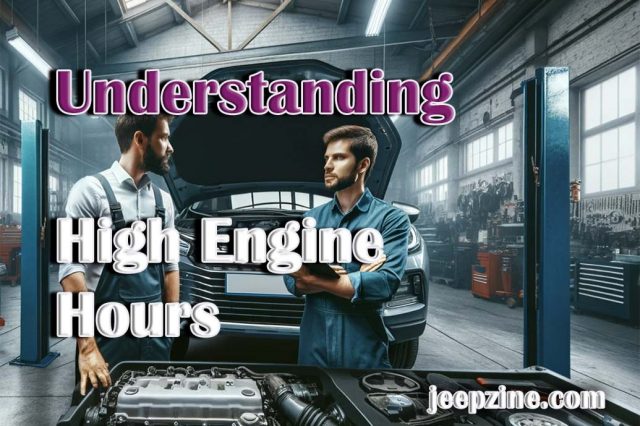
Understanding High Engine Hours
When buying a used vehicle, one of the most important factors to consider is the engine's total accumulated operating hours. But what constitutes high engine hours, and how can you evaluate if a used vehicle's engine hours are reasonable? This article takes an in-depth look at defining high engine hours ...
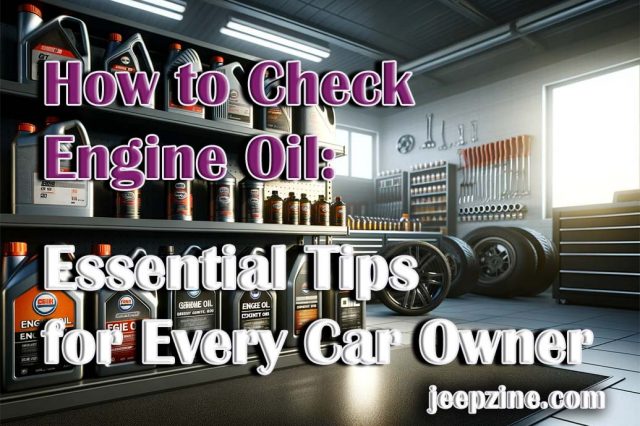
How to Check Engine Oil: Essential Tips for Every Car Owner
Mastering the process of checking engine oil is an indispensable skill for any car owner. This routine check is more than just a maintenance task; it's a critical measure to ensure the heart of your vehicle, the engine, operates seamlessly. Engine oil plays a multifaceted role, from lubricating moving parts ...

Understanding Brake Cleaners: Their Role and Importance
Brake cleaners play a pivotal role in vehicle maintenance, particularly in ensuring the optimal performance and longevity of the braking system. These specialized cleaning agents are formulated to tackle the tough job of removing various contaminants, including grease, oil, brake fluid, and brake dust, from the brake parts. The importance ...
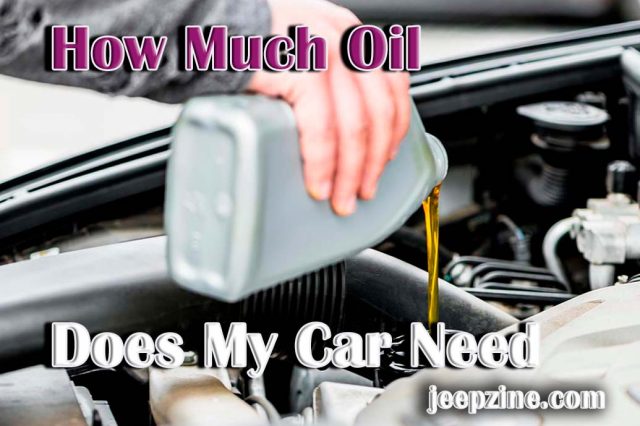
How Much Oil Does My Car Need
It is crucial to emphasize how vital regular vehicle maintenance is for ensuring its smooth running, efficiency, and extended lifespan. A vital element of this maintenance is the regular checking and replacing of the motor oil that keeps the engine's parts lubricated and running smoothly. Yet one question that often ...
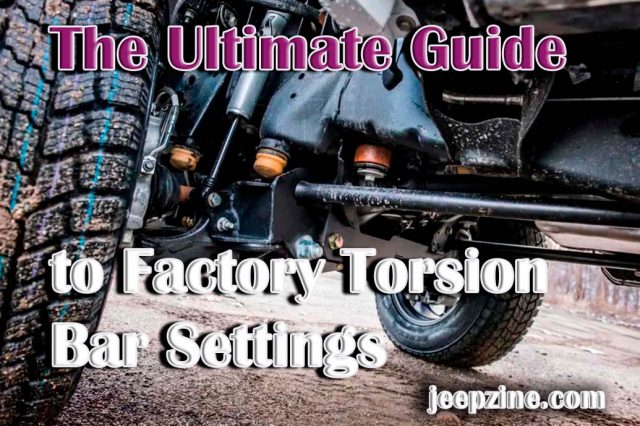
The Ultimate Guide to Factory Torsion Bar Settings
In today's industrial world, the importance of understanding machinery and its components cannot be overemphasized. Torsion bars, for instance, have become an essential part of the automotive and manufacturing industry. However, achieving their correct configuration continues to be a challenging endeavor for numerous technicians and engineers. This guide is designed ...

How to Measure Lift on Jeep JK
Measuring the lift on a Jeep JK is an important aspect for enthusiasts who are into customizing and enhancing their vehicle for off-road performance. The lift of a Jeep JK is not just about raising the vehicle higher off the ground; it is about optimizing the vehicle's capabilities for challenging ...
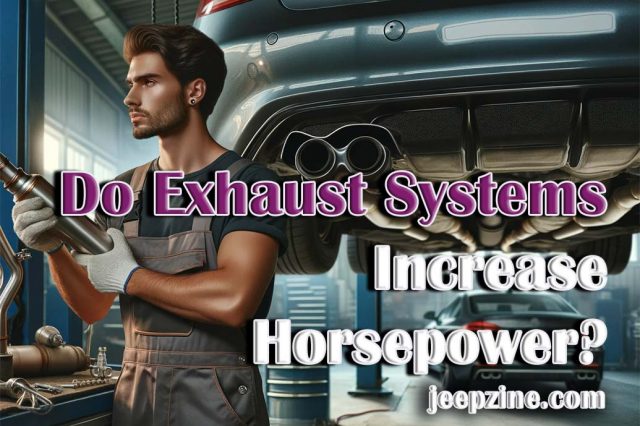
Do Exhaust Systems Increase Horsepower?
The relationship between exhaust systems and horsepower in vehicles is a complex and often discussed topic among automotive enthusiasts. The exhaust system of a vehicle is not just a pathway for expelling combustion byproducts; it plays a significant role in the performance of the engine. The efficiency of an exhaust ...
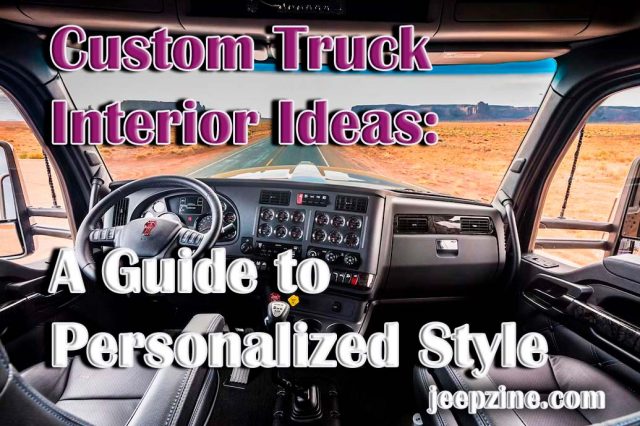
Custom Truck Interior Ideas: A Guide to Personalized Style
Welcome to the exciting world of custom truck interior design, where the only limit is your imagination. Embarking on this journey transforms your vehicle from a mere means of transportation to a personal statement, a reflection of your unique style and preferences. In this comprehensive guide, we delve into various ...
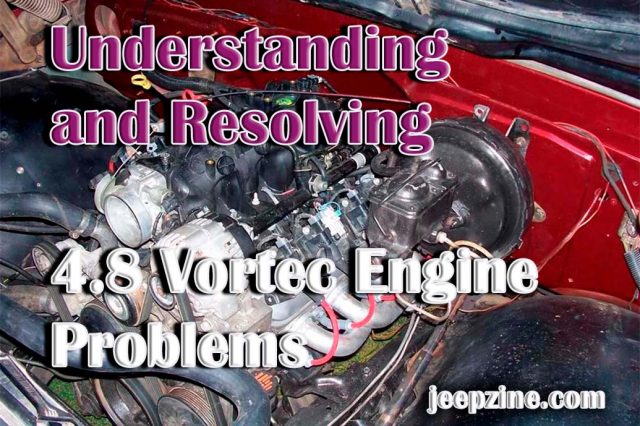
Understanding and Resolving 4.8 Vortec Engine Problems
In the realm of automobile engineering, understanding, and resolving engine problems is essential for the longevity and performance of a vehicle. One such engine that may pose certain issues over its lifespan is the 4.8 L Vortec. Introduced by General Motors in 1999, this engine has been utilized in a ...

Understanding the Use of Silicone Spray on Tires
Silicone spray, a versatile and effective solution, has been used for years in multiple applications across different industries. One of its less recognized but equally crucial applications lies in the upkeep and preservation of tires. The article will delve into an in-depth discussion about this innovative application and how it ...

How to Keep Black Cars Clean – a Detailed Guide
Maintaining the sleek, sophisticated allure of a black car is a task that requires consistent care and attention. The striking beauty of a black vehicle, whether it's an elegant sedan, a sporty coupe, or a spacious SUV, is undeniably appealing. However, this beauty often comes with the inevitable challenge of ...
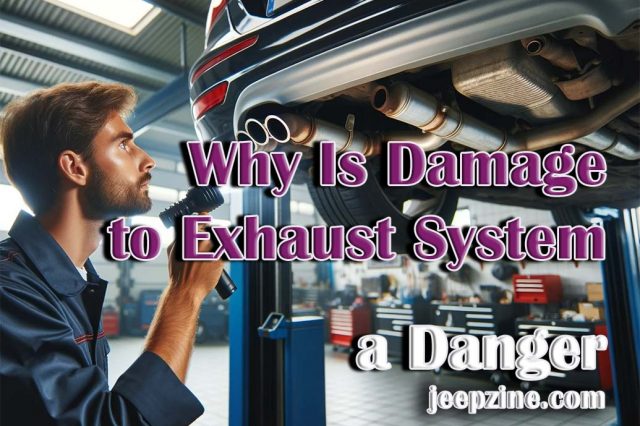
Why Is Damage to the Exhaust System a Danger?
The exhaust system on a vehicle serves the very important functions of expelling burnt gases from the engine and reducing the noise from the engine. It is comprised of several key components including the exhaust manifold, catalytic converter, muffler, and tailpipe. Damage anywhere along the exhaust system from the manifold ...
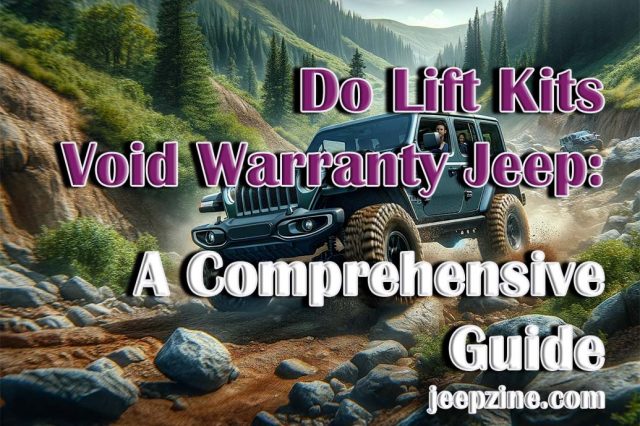
Do Lift Kits Void Warranty Jeep: A Comprehensive Guide
Installing a suspension lift kit is one of the most popular modifications for increasing ground clearance and fitting larger tires on Jeep Wranglers and Gladiators. However, many owners worry that elevating their brand new Jeep will void the manufacturer's warranty coverage. The answer is complicated. Federal regulations provide important protections ...
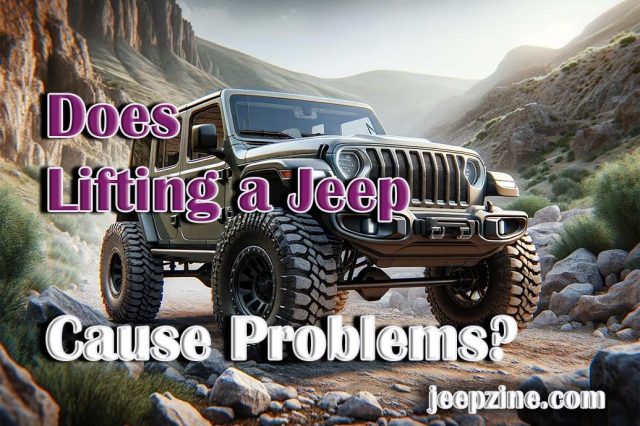
Does Lifting a Jeep Cause Problems?
Lifting a Jeep Wrangler or Gladiator adds greater ground clearance for off-roading and gives these iconic 4x4s an aggressive, rugged look. However, significantly raising ride height also places more stress on factory components and alters key suspension geometry, drivetrain angles, and weight distribution. If the lift height and parts are ...

What LED Headlights Fit My Car: Guide to Headlight Compatibility
Upgrading to crisp, bright, and stylish LED headlights is one of the hottest mods for any ride, but with so many LED bulb options out there it can be tricky to figure out which ones will properly fit your car. Before you swap out your dull factory halogens, there are ...
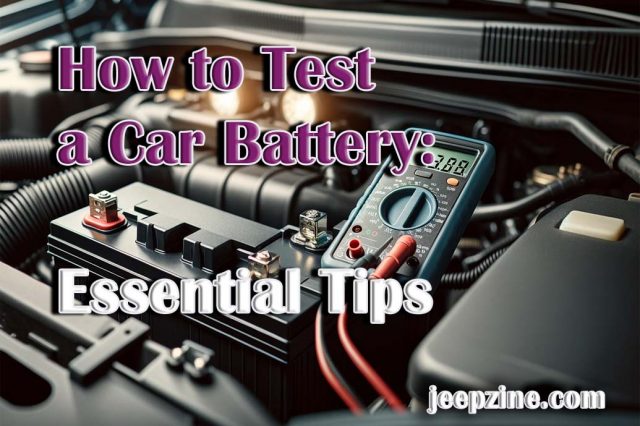
How to Test a Car Battery: Essential Tips for Every Driver
Knowing how to properly test a car battery is an essential skill for any vehicle owner. A weak or failing car battery can leave you stranded with a no-start condition and is the leading cause of breakdowns on the road. Testing your battery regularly and replacing it when necessary helps ...
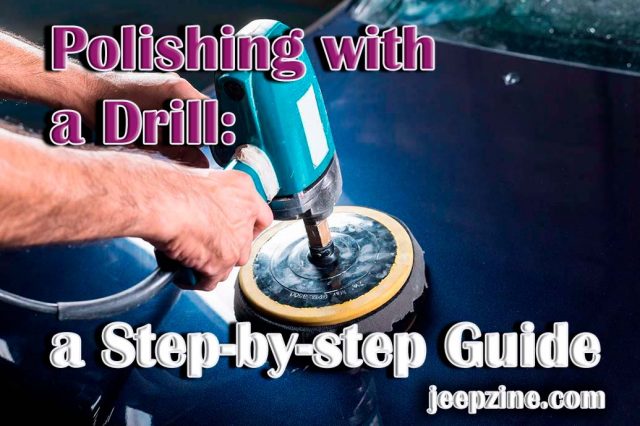
Polishing with a Drill: a Step-by-step Guide
Polishing, an essential final touch in any construction or renovation project, whether it's metal furniture or a vintage car, can drastically transform the look of an item. This is the magic that turns simple materials into exquisite pieces of art. But achieving that sleek and shiny finish requires not only ...
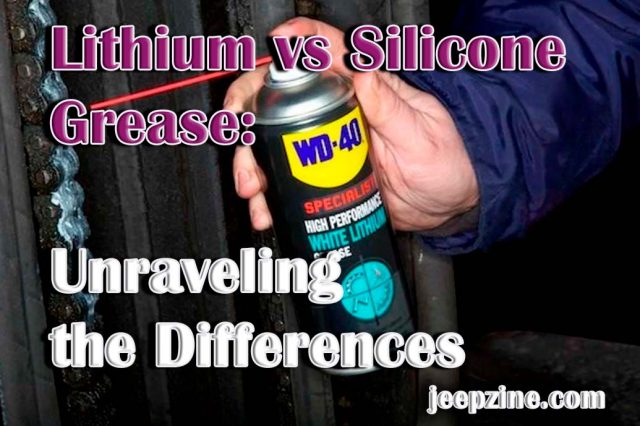
Lithium vs Silicone Grease: Unraveling the Differences
In the world of industrial maintenance and mechanical applications, the choice of lubricant can significantly impact the efficiency, performance, and longevity of equipment. Among the variety of lubricants available in today's market, lithium and silicone grease are two prominent types that are widely used in various industries due to their ...

Does Clay Bar Remove Scratches?
The removal of scratches and imperfections on the surface of our vehicles is a topic that has baffled many car owners for years. One commonly discussed solution is the use of a clay bar, but does it genuinely work in eliminating these unwanted distractions or is it merely a myth? ...
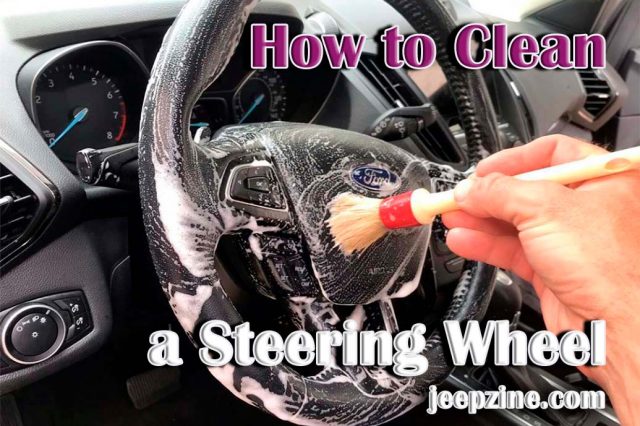
How to Clean a Steering Wheel
A steering wheel is a key component to any vehicle, acting as an interface between the driver and the automobile, allowing us to navigate safely and effectively. However, due to its frequent use, dirt builds up on the surface of the steering wheel over time, causing it to look unsightly ...
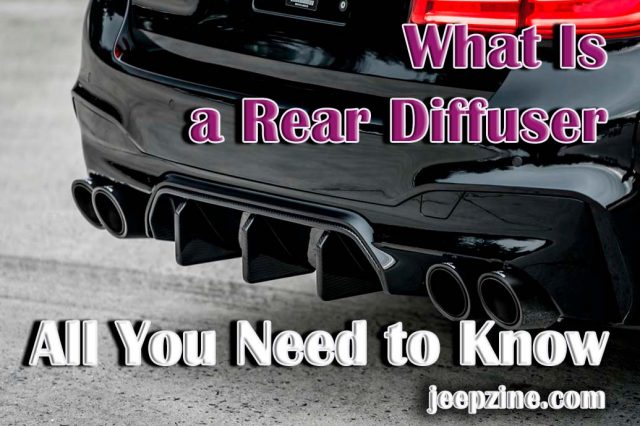
What Is a Rear Diffuser – All You Need to Know
Rear diffusers are super important for cars, guys! They do more than just enhance the car's appearance; they also improve its performance. These things are located at the back of the car, and they do some cool stuff. One of the main things they do is make the car more ...
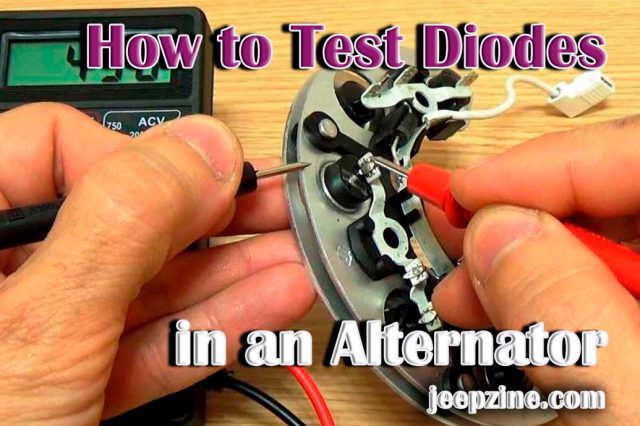
How to Test Diodes in an Alternator
Testing diodes in an alternator is a crucial part of guaranteeing the correct working of a vehicle's electrical system. The alternator is responsible for generating the power needed to run a vehicle's electrical components, such as headlights, windshield wipers, and other electronics. By examining the diodes in an alternator, you ...

Cold Weather Package BMW – All You Need to Know
The cold days of winter can be a struggle for car owners, leaving them with snow-covered cars and icy roads. But with the BMW cold weather package, you can have the confidence to tackle winter in style and comfort. The cold weather package includes all the features you need to ...

Polishing Wheel Lips for a Perfect Finish
Polishing wheel lips is an important and often overlooked process in the automotive repair industry. It is an essential step in restoring car wheels to their former glory and ensuring that they look their best. Improperly polished wheel lips can cause many aesthetic and performance issues, including poor paint adhesion, ...
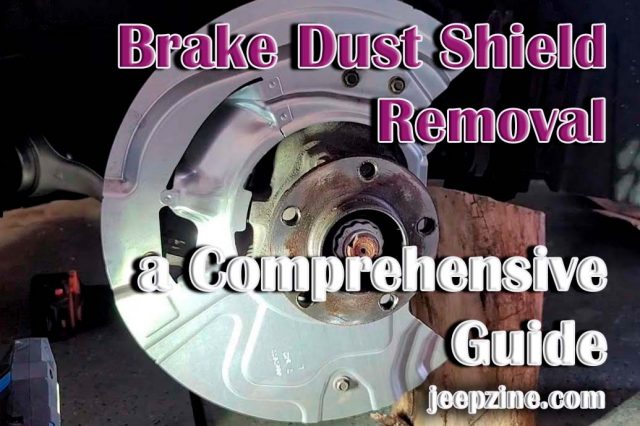
Brake Dust Shield Removal – a Comprehensive Guide
Brakes are among the most important components in your car, as they provide you with the essential safety feature of being able to control your speed and stop when needed. Without brakes, driving would be a dangerous endeavor. The brake dust shield is also an important component of your brakes ...
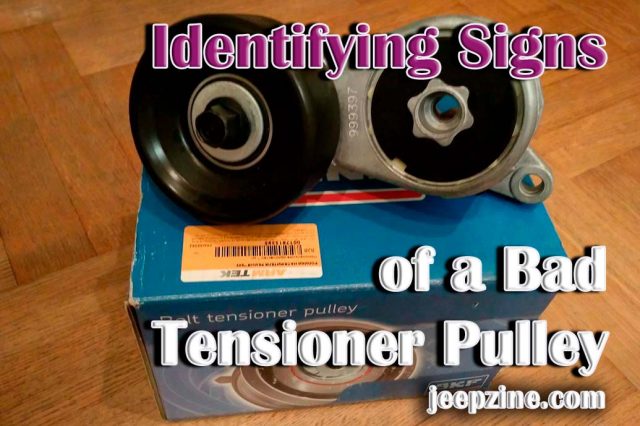
Identifying Signs of a Bad Tensioner Pulley
Welcome to our comprehensive guide designed to help you understand, diagnose, and resolve issues with one of the most critical components of your vehicle's engine - the tensioner pulley. This small but mighty part is pivotal in maintaining the correct tension on your vehicle's belts, ensuring everything from the alternator ...
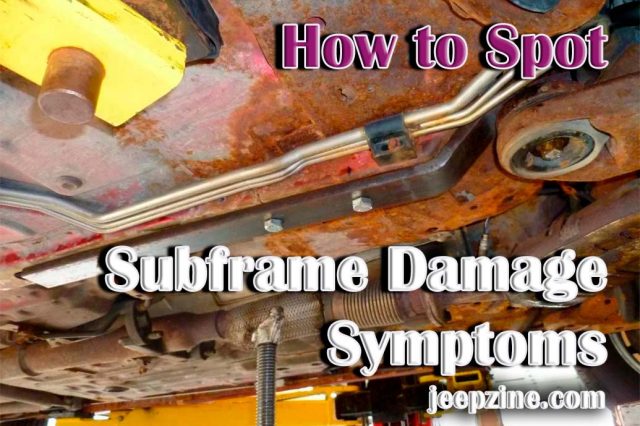
How to Spot Subframe Damage Symptoms
Subframe damage is no joke. The subframe plays a crucial role in supporting vital components like the engine and suspension. Any damage to this essential framework can have serious implications for the overall performance and safety of your vehicle. That's why understanding the basics of subframe damage is crucial for ...
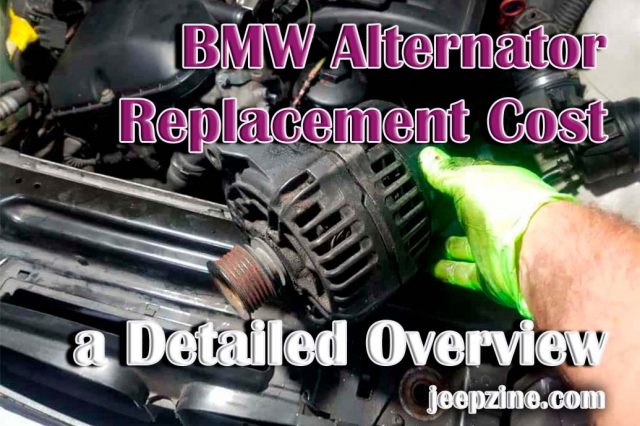
BMW Alternator Replacement Cost – a Detailed Overview
When it comes to maintaining the performance and reliability of your BMW, understanding the costs associated with crucial repairs is essential. Among these, alternator replacement is a significant maintenance aspect that every BMW owner should be aware of. The alternator plays a crucial role in your vehicle's electrical system, tasked ...
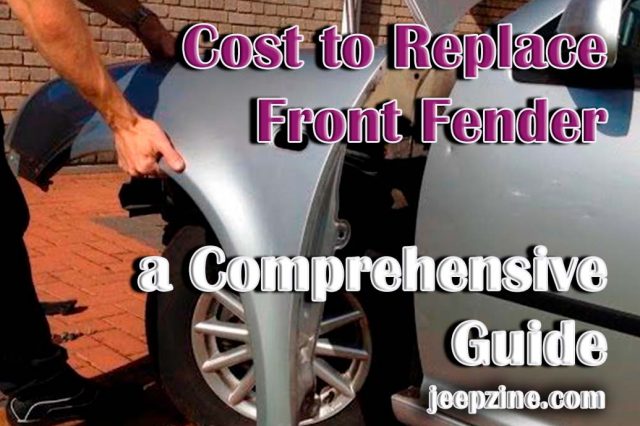
Cost to Replace Front Fender – a Comprehensive Guide
Replacing a front fender is an important part of car maintenance. It's a necessary repair that should be done when a car has been damaged in an accident or when rust and wear have taken their toll on the paint and metal. While it can be expensive, it doesn't have ...
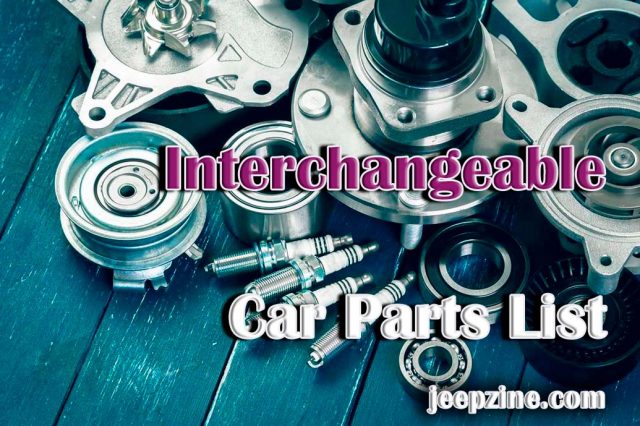
Interchangeable Car Parts List
Having a comprehensive interchangeable car parts list is crucial for the maintenance and repair of your vehicle. Knowing the different parts that are compatible with one another can make all the difference in ensuring that you have the right part for the job and that it is installed correctly. This ...
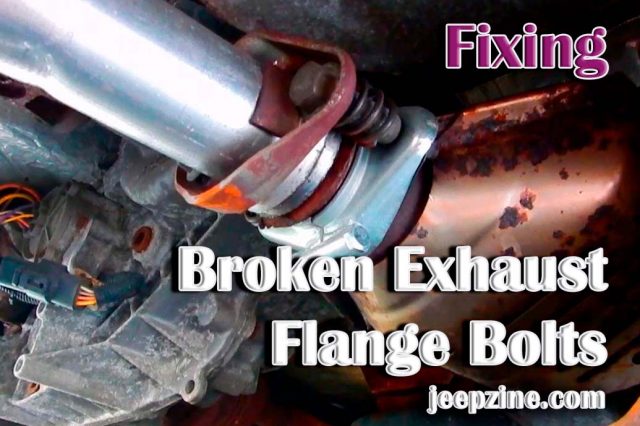
Fixing Broken Exhaust Flange Bolts
Dealing with a broken exhaust flange bolt can be daunting for any vehicle owner. This crucial component of your car's exhaust system ensures a tight seal between the exhaust manifold and the exhaust pipe, playing a vital role in your vehicle's overall performance and emission control. In this article, we ...

How to Unlock Ignition – Step-by-Step Guide
It's an all too familiar scenario: you get into your car, ready to drive off on your daily commute or errands, only to find that the ignition won't turn. Not knowing what's causing the problem or how to solve it can be stressful and frustrating. Fortunately, there are steps you ...
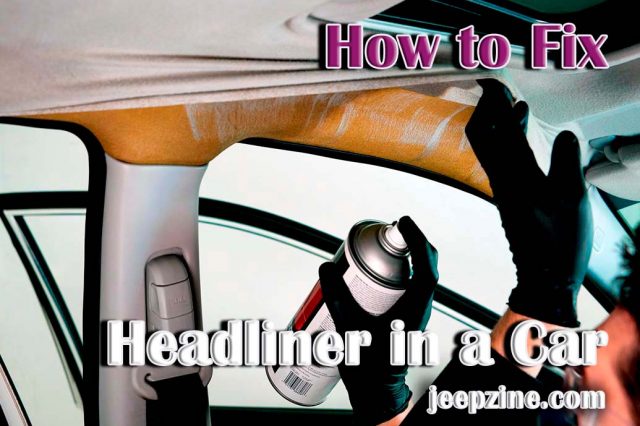
How to Fix Headliner in a Car
Headliners are an essential part of the interior of any vehicle, and when they become loose or sag, they can make a car look unattractive and uninviting. Fortunately, fixing a headliner does not require special skills or tools; it can be done with simple materials found at any hardware store ...
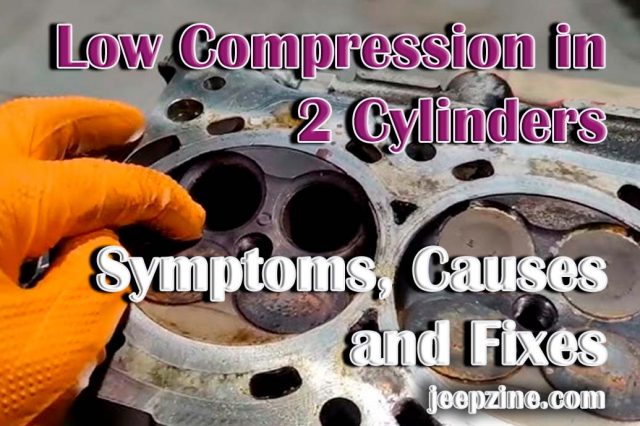
Low Compression in 2 Cylinders – Symptoms, Causes and Fixes
Compression is an essential component of the internal combustion engine and affects the efficiency, performance, and overall operation of the engine. Low compression in two cylinders can indicate a problem with your engine's internal components, such as valves or piston rings. It can also indicate that there may be a ...
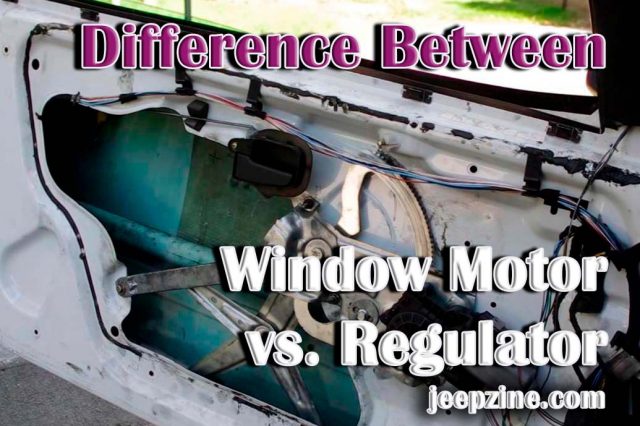
Difference Between Window Motor vs. Regulator
Window motors and regulators are two important components of a car window. They work together to allow you to open and close your car windows with ease. While they both help you with your window functions, understanding the difference between a window motor vs regulator can help you identify when ...
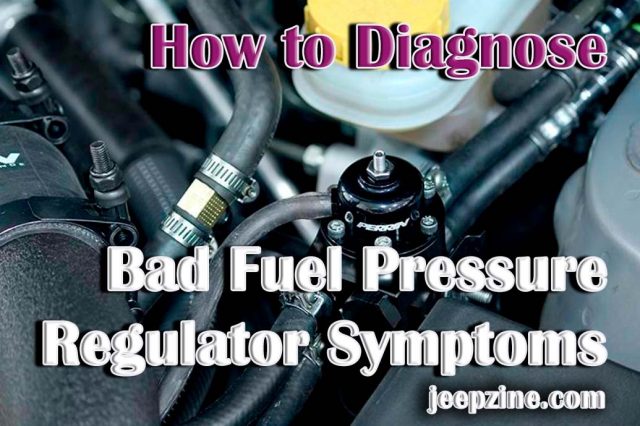
How to Diagnose Bad Fuel Pressure Regulator Symptoms
The fuel pressure regulator is an important component of a vehicle's fuel system. It is responsible for controlling the amount of pressure on the fuel line, which, in turn, helps ensure that your vehicle's engine operates as efficiently as possible. Unfortunately, when a fuel pressure regulator becomes faulty, it can ...
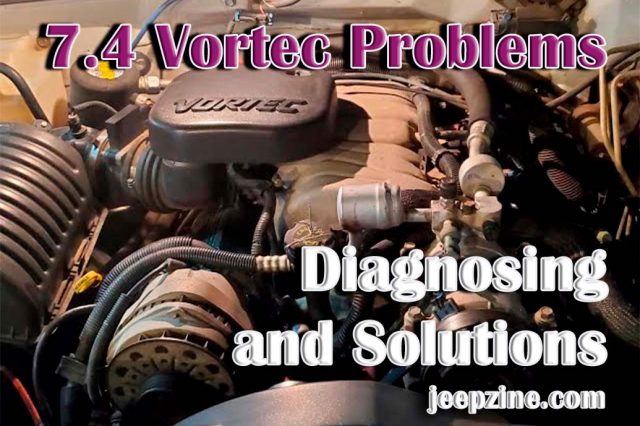
7.4 Vortec Problems – Diagnosing and Solutions
The 7.4 Vortec engine, also known as the Vortec 7400, is a big-block V8 engine primarily used in Chevrolet and GMC trucks in the late 1990s and early 2000s. This engine is reliable and powerful, but as with any engine, certain problems can arise over time. It's important to understand ...
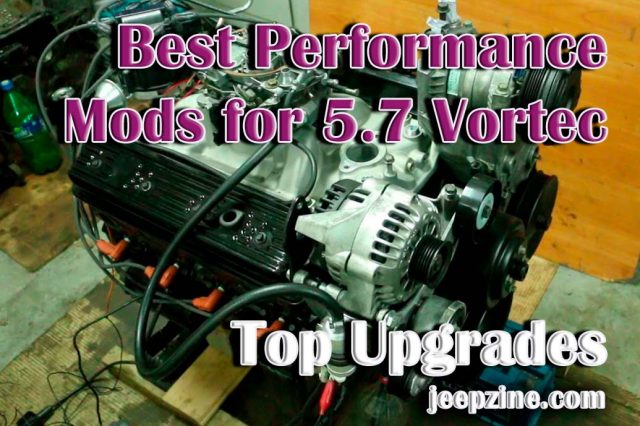
Best Performance Mods for 5.7 Vortec – Top Upgrades
A 5.7 Vortec engine is a highly reliable, efficient, and powerful motor found in many vehicles. For car enthusiasts looking to get the most out of their vehicle, the 5.7 Vortec engine is an excellent option for upgrading performance. With the right modifications, this engine can become even more powerful ...
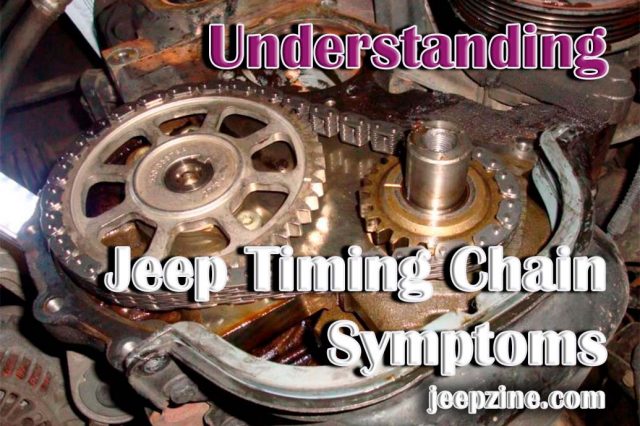
Understanding Jeep Timing Chain Symptoms
The Jeep brand has long been associated with reliability and durability, making it a popular choice for drivers looking for a robust and dependable vehicle. However, even the most reliable cars can suffer from timing chain issues, which can cause numerous problems for drivers. If you drive a Jeep and ...
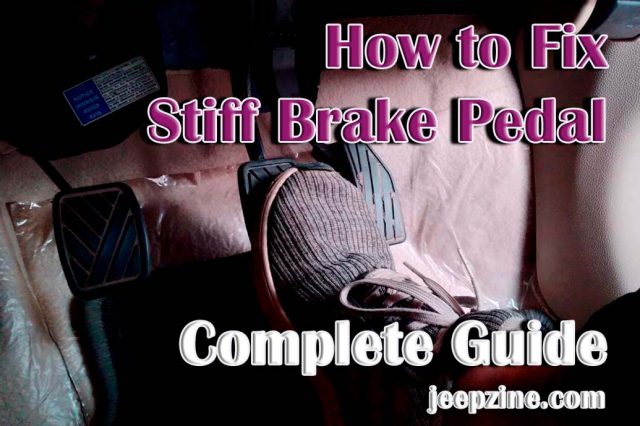
How to Fix Stiff Brake Pedal – Complete Guide
Having a stiff brake pedal is an incredibly dangerous issue in any car. Not only does it indicate that something is wrong with the braking system, but it can also lead to a crash if the brakes are not responding correctly. Fortunately, a stiff brake pedal does not always indicate ...

What Does Battery Saver Active Mean?
Have you ever noticed the "battery saver active" indicator flashing while driving your vehicle? You may have wondered what this meant and why it is crucial to understand. It can be confusing when figuring out what a "battery saver active" light means, especially if you don't know much about car ...
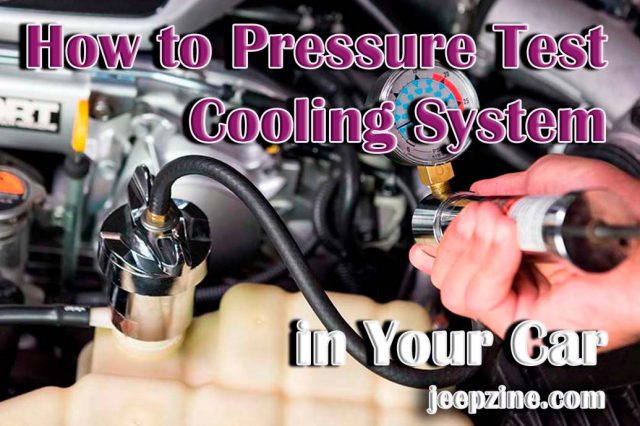
How to Pressure Test Cooling System in Your Car
Keeping a car's cooling system in good condition is vital for its long-lasting performance and durability. The cooling system removes excess heat generated by the engine and other components, protects them against wear and tear, and provides a comfortable cabin environment for the driver. If the cooling system isn't operating ...
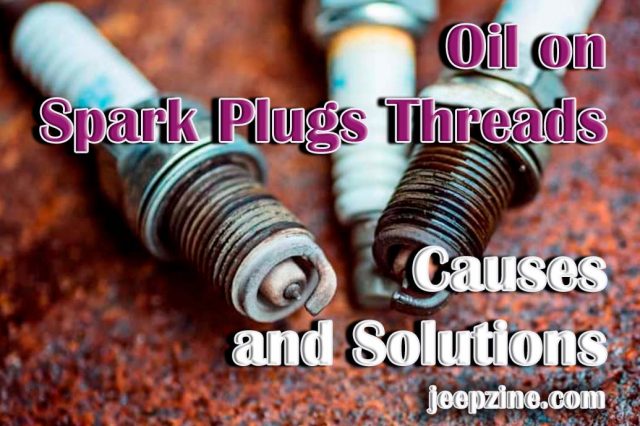
Oil on Spark Plugs Threads – Causes and Solutions
The spark plugs in your vehicle are crucial in igniting the fuel-air mix, enabling your engine to operate. As such, it is important to monitor these components and ensure they are running as they should be. One issue you may encounter with these spark plugs is the oil on their ...
Rebuilt Transmission Cost – Detailed Guide
A rebuilt transmission can be expensive, and many vehicle owners must learn the procedure. The thought of a rebuilt transmission might bring up images of costly repairs and expensive parts. However, understanding the factors determining the cost of a rebuilt transmission can help car owners make an informed decision regarding ...
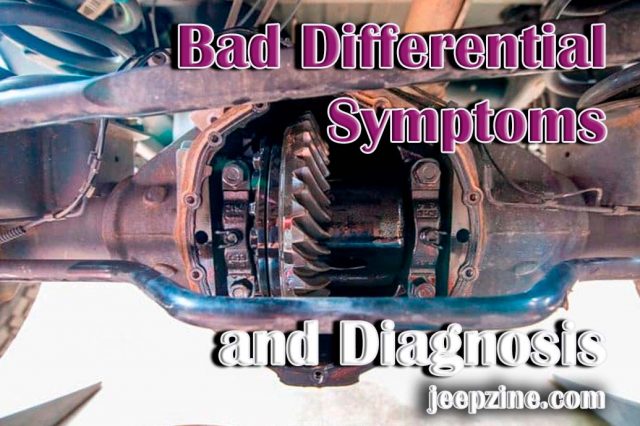
Bad Differential Symptoms and Diagnosis
The differential in a car is an essential part of the drivetrain that allows the inner and outer wheels to spin at different speeds, making for a smoother and more comfortable ride. Unfortunately, issues with a differential can lead to serious problems with the car's ability to accelerate or turn ...
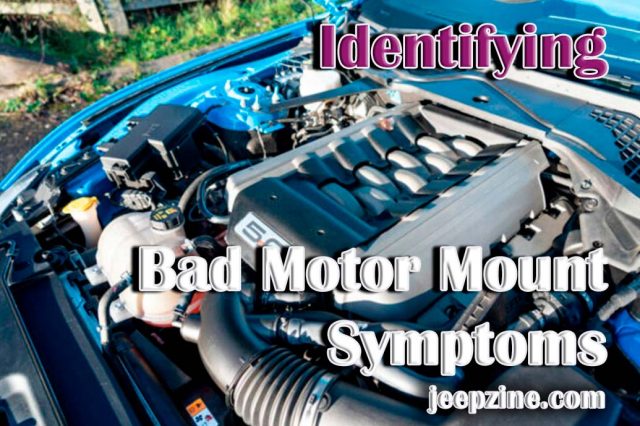
Identifying Bad Motor Mount Symptoms
In today's modern world, regular car maintenance is essential to ensure the safe running of your vehicle and to avoid costly repairs in the long run. A key part of ensuring a smooth and safe ride is paying close attention to the motor mount, an integral part of the engine ...
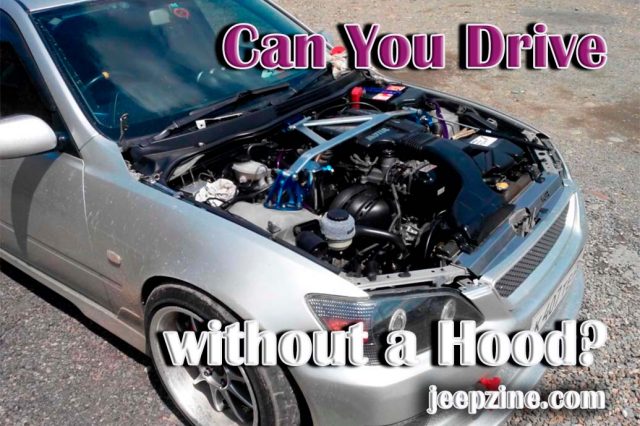
Can You Drive without a Hood?
The car's hood is crucial for a vehicle, safeguarding the engine, radiator, and other parts. But what happens if you find yourself in a situation where the hood is missing or broken? Can you drive without a hood? This article will explore the safety risks associated with driving without a ...
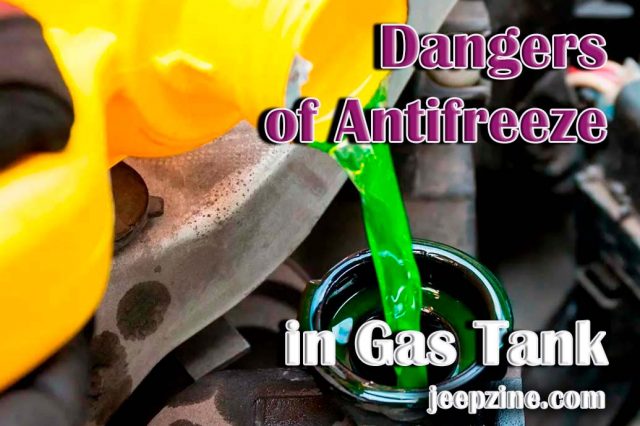
Dangers of Antifreeze in Gas Tank
Antifreeze is a common chemical substance used in vehicles to keep the engine cool and prevent it from freezing. However, the results can be disastrous when antifreeze enters the gas tank. Exposure to antifreeze can be harmful to both your health and your vehicle. In this article, we will explore ...

How to Find TDC on a 4.3 Vortec Engine
The 4.3 Vortec engine is one of the most popular and powerful engines on the market, and for good reason. It is reliable, efficient, and has a long lifespan. But with any engine, you must maintain it properly to ensure longevity. One way of doing this is to find the ...
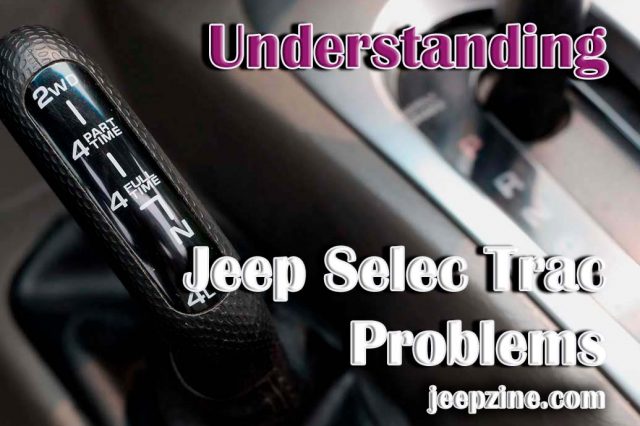
Understanding Jeep Selec Trac Problems
Jeeps have been a popular choice of vehicle for decades, and the Jeep Selec Trac is no exception. Found in various models ranging from the CJ-7 to the Wrangler, the Selec Trac system was designed by Chrysler to provide drivers with an efficient and reliable 4WD system. With its wide ...
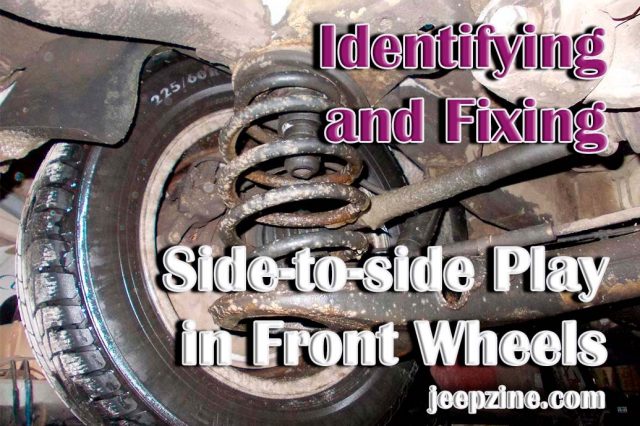
Identifying and Fixing Side-to-side Play in Front Wheels
A malfunctioning car can be annoying, but it's not always a hopeless situation. Recognizing and addressing typical car issues when they emerge can save you both time and expensive repair costs. One of drivers' most common issues is side-to-side play in front wheels. Luckily, this problem can be easy to ...
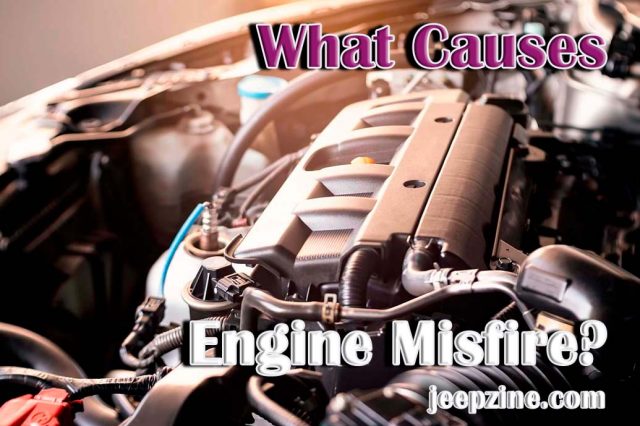
What Causes Engine Misfire?
The engine is the heart of a car, providing it with the necessary power to move and operate all its systems. Without a properly functioning engine, a vehicle will not only fail to move but will also be unable to function. One common problem affecting an engine is misfire, which ...
Will Car Run without a Battery? All You Need to Know
The modern car has become a part of everyday life in recent years. Car owners rely on their vehicles to transport them safely and reliably wherever necessary. But what happens when an essential component stops working? A car battery is integral to any vehicle, providing the electrical current that powers ...
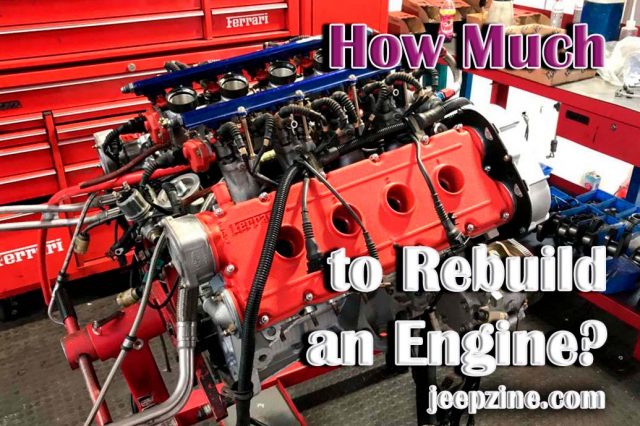
How Much to Rebuild an Engine?
Engines are the heart and soul of a vehicle, powering its movement and performance. When they malfunction, it can lead to expensive repairs for any vehicle owner. But how much does it cost to rebuild an engine? This article examines the factors that influence the cost of rebuilding an engine, ...
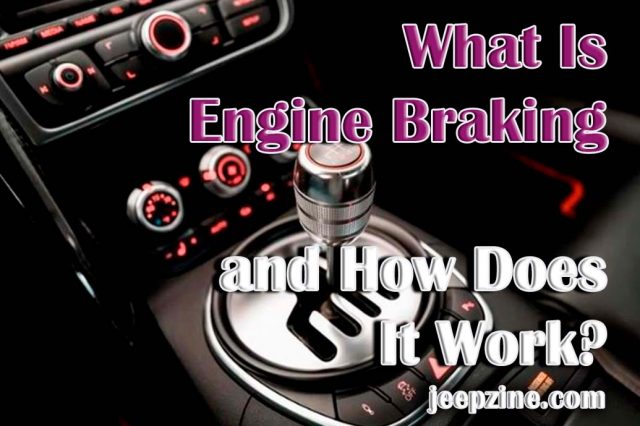
What Is Engine Braking and How Does It Work?
What is engine braking? This is a technique drivers employ to slow down their vehicles without applying the brakes. It is a method of controlling speed and deceleration that uses the engine's momentum to slow down the car. This form of braking can be used in manual and automatic transmissions, ...
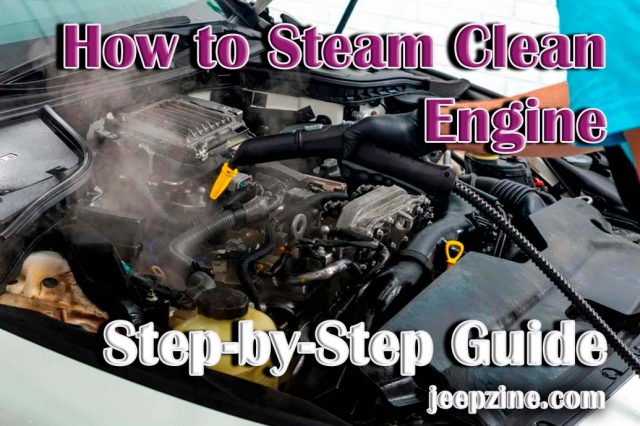
How to Steam Clean Engine – Step-by-step Guide
Do you own a car or truck? Are you looking for a way to keep your engine looking nice while preserving its performance and reliability? If so, then steam cleaning your engine is the perfect solution! Steam cleaning an engine does more than make it look nice; it also helps ...
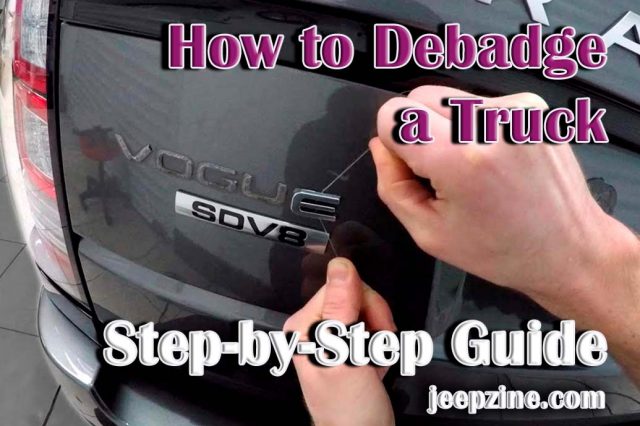
How to Debadge a Truck – Step-by-Step Guide
Removing badges and emblems from a truck can significantly personalize the look of your vehicle. "Debadging" is another term for it, and it's gaining popularity among automotive enthusiasts. This process is relatively easy but requires some extra steps if you want to do it without damaging the paint job. In ...
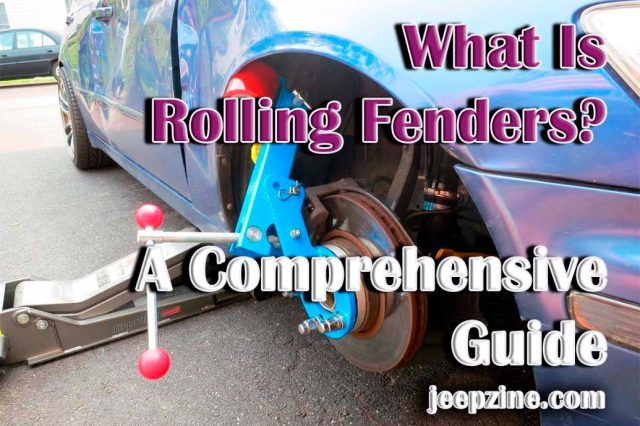
What Is Rolling Fenders? A Comprehensive Guide
Rolling fenders is a process of modifying the shape of a car's wheel fenders to provide clearance for wider wheels and tires. This process has become increasingly popular among car enthusiasts looking to customize their vehicles, as it can significantly improve the appearance and performance of a car. It can ...
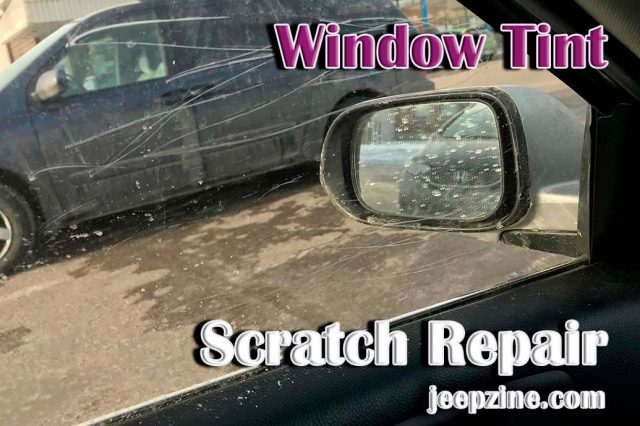
Window Tint Scratch Repair
Many car owners opt for window tinting to enhance their vehicle's aesthetics and shield themselves from the sun's rays. Unfortunately, window tints can become scratched over time, leading to an unsightly appearance and reduced visibility. Luckily, you can implement measures to fix scratches on window tint. In this article, we'll ...
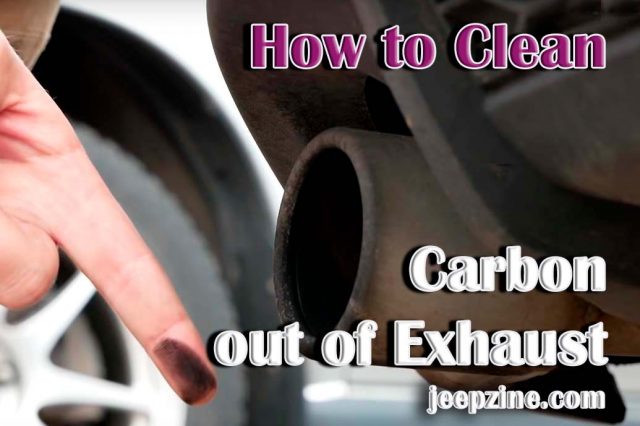
How to Clean Carbon out of Exhaust
Regular cleaning is essential for maintaining your vehicle's performance and efficiency. Keeping your vehicle's exhaust system free of carbon buildup is critical to this maintenance routine. Carbon buildup can interfere with the optimal performance of your engine and its emission control system, leading to lower fuel efficiency and possible damage ...

How to Polish a Windshield – a Step-by-step Guide
Polishing a windshield is something every car owner needs to know how to do, yet it is often overlooked. Windshields are integral to any vehicle, providing visibility and protection from the elements. Unfortunately, they can get scratched and lose their shine over time, making visibility challenging. While many commercial windshield ...

How to Clean Chrome Rims
Chrome rims add an element of style and luxury to any vehicle. They not only look fantastic but are also simple to maintain and clean. Unfortunately, over time, chrome rims can accumulate dirt, grime, brake dust, and other contaminants that can make them look dull and dingy. Fortunately, with the ...