Small block Chevy valve adjustment is an important maintenance step for running your engine smoothly. It’s relatively easy but paying attention to detail is key. If you don’t do it correctly, the valves may not close properly, and you could end up with more problems than when you started. This article will provide detailed instructions on how to adjust the valves correctly to keep your small block Chevy running in top shape. With the proper preparation and some know-how, adjusting the valves on your small block Chevy should be no problem. Whether you’re an experienced mechanic or just getting into maintaining cars, this guide should give you all the information to ensure your valve adjustment job goes off without a hitch.
Tools Needed
 Before beginning any work, ensuring you have the right tools for the job is always best. Firstly, you’ll need a good-quality feeler gauge to measure the gap between the rocker arm and the valve stem. A wrench set, particularly a 5/8″ and/or 9/16″ wrench, is essential for adjusting the rocker arm nuts. Additionally, a flat-head screwdriver might come in handy for some adjustments. A torque wrench is beneficial to guarantee the appropriate torque is applied to the rocker nuts. For those who want to be extra precise, a dial indicator can be used to measure valve lift. Lastly, having a clean rag and some engine oil or assembly lube will help keep things tidy and well-lubricated during the adjustment process. These handy tools will make your job much easier and help ensure you do it right. Once you’ve gathered all the essential tools, you can begin.
Step-by-step Guide
Before starting, ensure that the engine is cool. It provides safety and accuracy during the adjustment process.
-
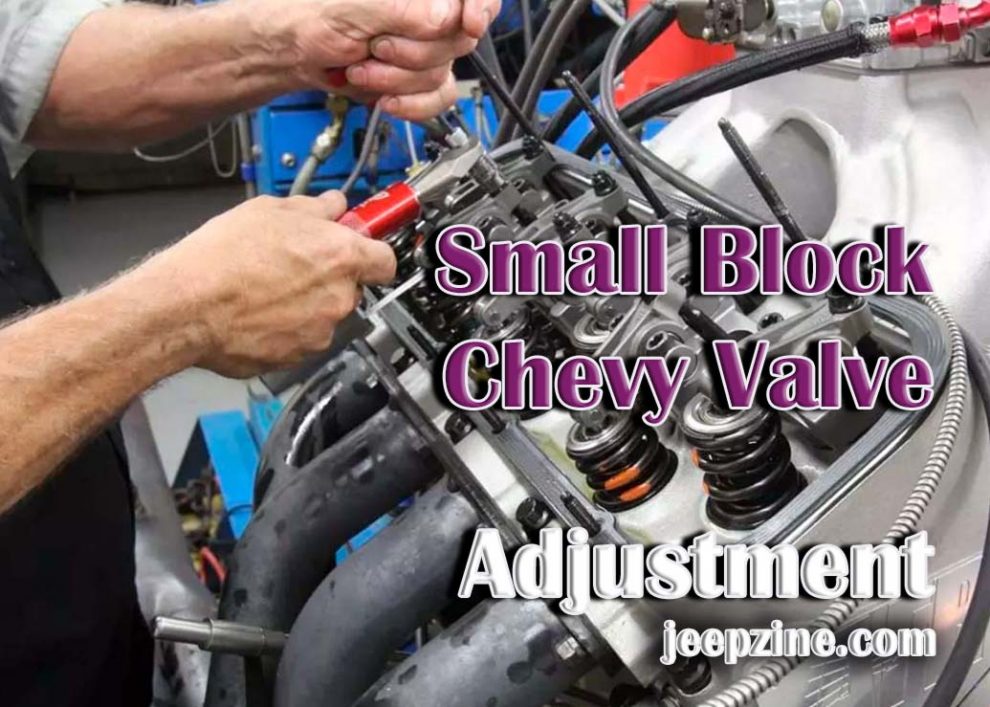
Removing Valve Covers: The first step in adjusting the valves is to remove the valve covers. It is done by removing the bolts, holding the valve covers in place, and carefully lifting them off the engine. Make sure not to lose any bolts or gaskets during removal, and also be careful not to spill any oil during this step.
-
Finding the Top Dead Center on the Compression Stroke: The second step is to locate the top dead center on the compression stroke. It can be done by slowly turning the crankshaft clockwise until you find the spot where all the valves for a particular cylinder are closed. Use a wrench or a socket wrench to ensure you turn it in the correct direction. Once you have found TDC, mark it with a piece of chalk or paint to know where it is for future reference.
-
Setting the Intake Valves: Now that you have located TDC, you must set both intake and exhaust valves for each cylinder one at a time. Start with adjusting only one valve from each cylinder at a time, working your way around the engine in a clockwise direction until all of them have been adjusted. To adjust an intake valve, back off its lock nut and then use your feeler gauge to measure the .010″ – .015″ gap between its rocker arm and valve stem tip. If necessary, adjust by tightening or loosening the rocker arm nut until the desired gap is achieved, and then retighten the lock nut securely afterward.
-
Setting the Exhaust Valves: Now that you have set the intake valves, it’s time to adjust the exhaust valves. The process for setting exhaust valves is the same as with intake valves. Set your feeler gauge between the .015″ – .020″ gap between its rocker arm and its valve stem tip and make any necessary adjustments. Once again, be sure to tighten both lock nuts securely after making all adjustments.
Finishing Up Valve Adjustment
Once all valves have been adjusted, you need to check your work. Start the engine and allow it to run at idle for several minutes, inspecting the valve covers for potential leaks. If all looks good, turn off the engine and reattach the valve covers using new gaskets and bolts if necessary. Finally, give each bolt a once-over with your torque wrench to ensure they are tightened to specification, and then you’re finished.
<!—->
Final Thoughts
Valve adjustment is an essential maintenance task for ensuring the longevity and efficiency of your small-block Chevy engine. Regular checks and timely adjustments can prevent unwanted wear and tear, boost engine performance, and improve fuel economy. Remembering the importance of precision and attention to detail when conducting valve adjustments is essential. A slight misstep can lead to engine problems. However, with the right tools and the provided step-by-step guide, even novice mechanics can confidently undertake this task and keep their engines running smoothly. Always refer to the manufacturer’s specifications for your specific engine model and year. Regular maintenance and periodic checks are the best way to ensure your engine’s optimal performance and longevity. Safe driving!