
Spark plugs are one of the most durable and cheapest parts in any car. When properly taken care of, they last up to 100K miles, or more. And that’s a lot because the average US citizen drives 14-15K miles a year. They don’t last forever, though, even if you’ve got a set of the Best Spark Plugs for Jeep. The most obvious sign of faulty plugs is an engine misfire.
Today’s drivers often don’t know what’s going on under the beautiful plastic covers in the underhood of their cars. But absolutely everyone knows about the need to fill up the washer, check oil levels and consumables, including changing spark plugs. The spark plug serves to ignite the fuel-air mixture in the engine and the condition of this element is an important indicator of the performance of the engine itself. And today I will tell you in detail how to replace Best Spark Plugs for Jeep. Let’s go!
Preparing for the Job
 Don’t worry: plug replacement is a rather simple and straightforward process. All you’ll have to do is follow my instructions, and you’ll be done in no time! The passenger side might prove to be a bit tricky, though. Now, before we get into the meat and potatoes, here’s a list of everything you’re going to need. This stuff doesn’t cost a lot, by the way, and most drivers already have at least some of these tools in their garages:
- A 3/8-inch ratchet
- An 18-inch extension for the ratchet
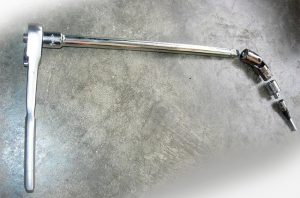
- A 3/8-inch torque wrench
- A 5/8-inch spark-plug socket
- A regular 3/8-inch drive socket
- A 3/8-inch swivel socket
- Mechanical fingers
- A gapper for the plugs
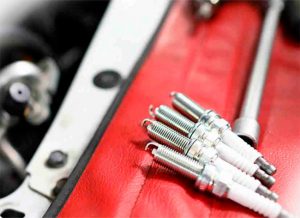
- A brand-new set of spark plugs
- A wire set (one will do) and a wire tray
- A decent bottle of dielectric grease
- Anti-seize
- Protective gloves
Yes, I know that’s a really long list, but don’t forget that a repair shop will charge you 200-300 US dollars for the labor alone, if not more. This way, you’ll be able to save some bucks and spend them on something else. If you do everything right, we’ll be done in 1/1.5 hours, or even sooner.
Getting Started
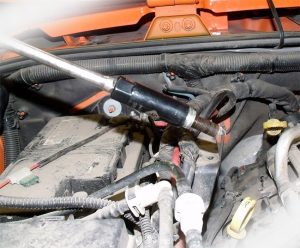
 Before getting your hands dirty, the first thing you should do is disconnect the negative battery cable – for safety purposes. With that done, start with the spark plug wire of the 2nd cylinder (it’s the one on the driver’s side front). The boot will probably resist. Try twisting it a bit to loosen it up. And don’t forget to remove any dust, pollen, or debris that you’ll probably see around the cylinders. The actual spark plug comes next.
To remove it, you’ll need a ratchet with an extension, a spark-plug socket, and a swivel. All going smoothly, I hope? Good, then use that gapper and adjust the new plug so that it’s at 0.50. Here’s how you do it: place the gapper right between the center and the grounding electrodes and slide it until you feel slight resistance. If the gap is wrong, bend the electrode (in or out depending on the gap). Only apply force to the grounding electrode, not the center one!
Installing the New Spark Plug
 Grab your brand-new and shiny plug with the spark plug socket. Do you see a hole inside the cylinder’s head? That’s exactly where the plug should go. Start by turning it with your hands – turn the socket clockwise. It’s very important to be careful and gentle at this stage. The plug shouldn’t be hard to insert into the head. If it’s not fully “cooperating”, don’t push it. Remove the plug, check for any damages, and go again.
Once the plug is sitting inside the cylinder nicely, use the torque wrench on the plug. Set it to 12ft. lbs. for the best result. Now it’s time for the dielectric grease to enter the scene. Apply a relatively small amount on the spark plug and coil pack terminals. Next, install the wire. Repeat everything we just did with the rest of the wires and plugs on the driver’s side.
Moving on to the Passenger Side Plugs
 Alright, here’s where it gets a bit tricky. Now we have to disconnect the wires, and you do that with light twisting movements when pulling the plugs away. And make sure that you remember which wires connect to the coil pack. Because if you don’t, that’ll cause you a lot of trouble. One way to go about this is to simply write the cylinder number on the wire boot (a sharpie should do).
Disconnect every single wire from the passenger’s side. To make some room for yourself, take out the crankcase vent hose and the retaining bracket (the one sitting on the heater hose). Lift the wire tray to remove the retainer. The wire assembly should be easy to access now. I highly recommend replacing the wire tray while you’re at it.
As for the spark plugs, the routine is basically the same as with the driver’s side front. There should be a couple of clips that attach the wires to the tray. Get rid of the clips and start replacing the wires. Do this one at a time so that you can keep track of things.
Finishing Up
To make things easier, attach the wire ends that are supposed to connect to the coil terminals to each other with tape. With that done, do your best to “push” the wires from the passenger’s side to the driver’s side. For this, the mechanical fingers tool will come in handy: use it to “fish out” the wires. Last, but not least, reattach everything that you disconnected earlier (the wires to the terminals, the crankcase breather hose, and the retainer).
That’s about it! Check the engine compartment and make sure you haven’t left any tools or anything else left there. Re-connect the negative cable (on the battery). Before starting the car, apply the brakes. The transmission should be in “neutral”, by the way – don’t forget that.
Add Comment