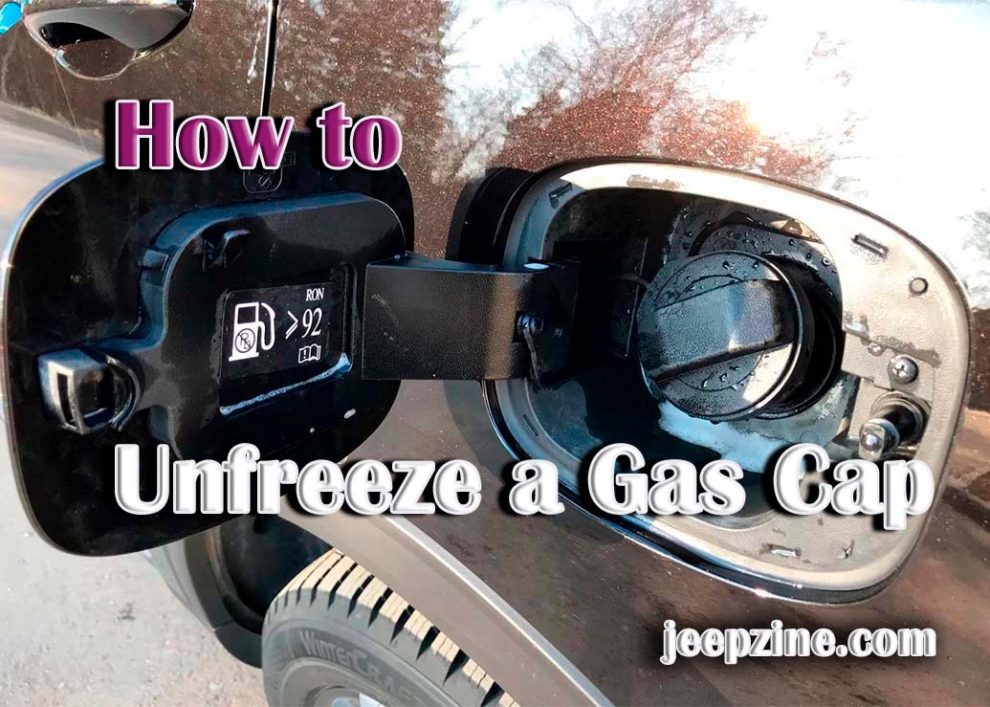
Gas caps are essential automotive components that keep fuel from leaking out and debris from entering the engine. If a gas cap freezes, it can cause several problems for your vehicle, from reducing fuel efficiency to causing a check engine light to come on. This guide will walk you through what causes a frozen gas cap, identify the problem, methods for unfreezing the cap, preventive measures to avoid future freezing, as well as tips and tricks for successful maintenance.
What Causes a Frozen Gas Cap?
 Extreme cold weather conditions in combination with moisture on the surface of the cap or seal cause a frozen gas cap. When liquid water comes into contact with the metal or plastic of a gas cap while temperatures are below freezing (32°F/0°C), ice forms around the locking mechanism and prevents it from opening. If left untreated, this issue can become permanent and require the replacement of the entire assembly.
The Importance of Addressing a Frozen Gas Cap
When left unattended, frozen gas caps can lead to several issues with your vehicle’s performance: decreased fuel efficiency due to air leaks, damaged internal components due to contaminants entering; and an illuminated check engine light which requires costly repairs. Additionally, a frozen gas cap can interfere with a safety inspection and make it impossible to refuel your car until the issue is resolved.
Identifying the Problem
Common Symptoms of a Frozen Gas Cap
The most common symptom indicating that your gas cap has become frozen is an inability to open it. You may also notice fuel odors emitting from your car’s fuel tank or a decreased engine performance due to air leaks and reduced fuel efficiency.
Troubleshooting and Diagnosis
If you experience any of these symptoms, you should check the temperature outside as this will indicate whether the freezing is caused by weather or something else. If temperatures are below 32°F/0°C, the gas cap has likely frozen over. To confirm this, you can try to open your gas cap using gentle pressure—if there’s no movement, it will most likely become frozen shut.
Tools and Materials Needed
Essential Tools for Unfreezing a Gas Cap
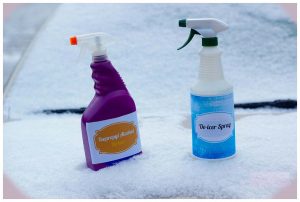
To unfreeze a gas cap, you will need access to certain tools: de-icer spray; hair dryer; cloths; a heating pad (or hot water bottle); and winter gloves for safety.
Additional Supplies for Safety and Convenience
It’s also recommended to have additional supplies on hand for safety and convenience, such as an all-weather lubricant, lubrication brush, protective eyewear, and a fire extinguisher.
Methods for Unfreezing a Gas Cap
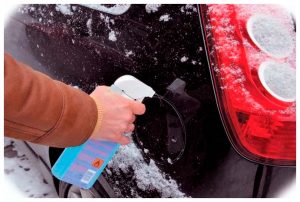
 Using a De-Icer Spray
If your gas cap has frozen, you can use a de-icer spray to unfreeze it. This should be done outdoors in an open area as the chemicals in the spray are flammable. Start by spraying the outside of the cap and sealing it with the de-icer agent until lightly coated; then wait several minutes before opening it up. If this method doesn’t work, you can move on to one of the other solutions listed below.
Applying Heat with a Hair Dryer
Using a hair dryer is another method that can be used to unfreeze a gas cap; however, it should only be done with caution due to its high heat output. To start:
- Direct your dryer on a low heat setting at the gas cap for several minutes.
- Once the cap has been heated, open it using gentle pressure.
- If this method fails, move on to another solution listed below.
Warming Up the Vehicle
Your vehicle’s engine can act as a heat source and help unfreeze a gas cap if used correctly. To begin, start your car and let it run idle for 5-10 minutes before opening the gas cap. This should provide enough warmth to break through any frozen layers of ice or snow that may have formed on the seal or latch system.
Leveraging a Warm Cloth or Heating Pad
If you don’t want to use an aerosol de-icer or hair dryer, then a warm cloth or heating pad is another option that can be used effectively. Start by placing either material over the gas cap and leave it there for 10-15 minutes before trying to open the lid. The combination of heat and pressure should allow you to break through any frozen layers of ice that have formed around the seal or locking mechanism.
Preventive Measures to Avoid Future Freezing
Gas Cap Maintenance
To avoid future freezing issues with your gas cap, it’s essential to keep it maintained and inspected regularly. This includes wiping down the surface of the cap and seal to remove any debris and moisture that may have collected over time. Additionally, you should lubricate the locking mechanism with an all-weather lubricant such as WD-40® or a similar product to ensure optimal performance in cold weather conditions.
Regular Inspections
Another important measure for avoiding freezing issues is to have your gas cap inspected at least once a year by a qualified mechanic or technician. This should include a thorough inspection of the outside of the cap and its locking mechanism. By conducting regular inspections, you can identify minor problems before they become major freezing issues and significantly prolong your gas cap’s lifespan.
Preparing for Winter Weather
Finally, when preparing for winter weather conditions, check your gas cap for signs of wear or damage before temperatures drop below 32°F/0°C. If necessary, replace the seal with one specifically designed for cold weather use; this will help ensure that your vehicle’s fuel system remains sealed and secure during harsh winter storms. Applying an all-weather lubricant on exposed components can add a layer of protection against freezing temperatures.
Replacing a Problematic Gas Cap
 When to Replace Your Gas Cap
If your gas cap has become damaged or worn, it’s best to replace it as soon as possible. This will help avoid future freezing issues and reduce the chances of any contaminants entering your vehicle’s fuel system. Additionally, replacing a worn or broken gas cap can prolong the life of your car and help you pass mandatory safety inspections.
Choosing the Right Replacement
When selecting a new gas cap, choosing one that matches OEM (Original Equipment Manufacturer) specifications for your vehicle’s make and model is important. Also, choose one specifically designed for cold weather use to avoid future issues with freezing temperatures. You can purchase replacement caps at most auto parts stores or online retailers such as Amazon® or AutoZone®.
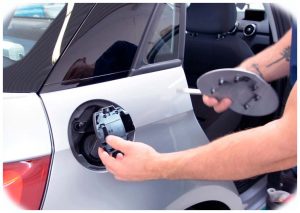
Installing a New Gas Cap
Once you have purchased an appropriate replacement, installation is relatively straightforward and simple: start by removing the old cap by unscrewing it counterclockwise, then line up the new cap with its corresponding threads and screw it on clockwise until it’s secured in place. Once it’s installed, ensure the seal is tight and secure before closing the fuel door and returning to your vehicle.
Additional Tips and Tricks
Ensuring Proper Gas Cap Fit
When purchasing a replacement gas cap, ensure that it fits securely on your vehicle’s fuel tank by checking the threads of both components are compatible. Additionally, you can use a thread detector tool or wrap a piece of paper around the tank opening to determine if they are properly matched. If they don’t line up correctly, you should purchase another gas cap that fits your vehicle properly.
Addressing Persistent Freezing Issues
Experience persistent issues with freezing temperatures despite regular maintenance. It may be time to consider other options, such as adding additional insulation or purchasing an engine block heater for your vehicle. These measures will help keep internal components warm during cold weather conditions and prevent future freezing issues with sensitive parts like the gas cap seal and locking system.
Safety Precautions
Using Flammable Materials Safely
All flammable materials, such as de-icer sprays, should be used in well-ventilated areas and away from open flames or sparks. Additionally, you should be sure to wear protective eyewear when handling these materials, as they can cause injury if not used properly.
Avoiding Injuries and Damage
When applying heat with a hair dryer, maintain a safe distance between the dryer and your gas cap to prevent burning the plastic or metal components. Additionally, you should use a cloth or heating pad when warming up the vehicle, as direct contact with hot surfaces can cause skin injuries.
Conclusion
A frozen gas cap can lead to several performance issues with your vehicle, such as decreased fuel efficiency and an illuminated check engine light. This comprehensive guide has outlined several methods for unfreezing a gas cap, including using de-icer sprays, applying heat with a hair dryer, leveraging warm cloths or heating pads, and warming up the vehicle. Additionally, preventive measures such as regular maintenance and inspections have been discussed to avoid freezing issues in future winter weather conditions. Finally, safety precautions were provided for working with flammable materials and avoiding damage or injuries while unfreezing your gas cap.
Add Comment