
If the radiator is leaking or you see steam coming out from the engine bay, that means a replacement is in order. Even if you’ve got the finest Cummins Radiator, it will give out on your eventually. The question is – should you hire a professional mechanic to take care of the replacement, or maybe you should try and do everything manually? First of all, don’t believe the myth that only a pro can handle this.
As long as you’ve got the right tools and have some entry-level experience with engine parts, it will be a pretty straightforward process. And with the help of my detailed guide, you’ll be done in no time! Without a proper radiator, you’ll run the risk of overheating the engine. So, to avoid that, follow my lead, and let’s get to work!
What you’ll need for the Job
- A new radiator (obviously)
- Fresh coolant
- A bucket for the old coolant
- Hoses and hose clamps
- Decent-quality thermostat
- A pair of gloves (goggles are also preferable)
- A couple of wrenches and a standard knife
- A screwdriver or pliers
- A jack with stands
- A Haynes or Chilton manual
Quick Tips and Tricks
Before we get to the meat and potatoes, I want to share a quick list of things to keep in mind when working with radiators:
- Make a habit of replacing the coolant every 30K miles
- The hoses should be replaced every 60K miles or so
- Only use coolant officially recommended for your car
- Don’t ever mix different coolants
- If the bolts are resisting, use penetrating oil
Step #1: Draining the Coolant/Antifreeze
 We start our Radiator Replacement by raising the car. For that, you’ll need a jack and a pair of jacks to support it. And don’t forget to activate the parking brake and put a wheel chock behind the rear wheels. That way, the vehicle won’t suddenly start moving in any direction. Next, locate the radiator clap and remove it. This is important: turn the engine off and wait for 10-15 minutes for it to cool off.
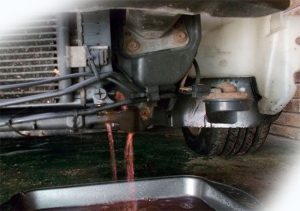
Otherwise, the cap might burn your fingers. Plus, that will eliminate the vacuum lock. The hoses come first: just squeeze them with your hands to get rid of the old coolant and flush the entire system. Don’t forget to put a big enough bucket right below the petcock. Remember: the coolant is pretty dangerous to humans and pets; plus, it can damage the environment.
So, again, make sure that the container will be able to accommodate all of the antifreeze. Ok, now open the petcock. Some folks prefer to do this by hand – I like to use pliers instead. If the coolant is rusty and/or dirty, you’ll have to flush it. The liquids need to be recycled – don’t just pour them into the ground!
Step #2: Removing the Old Radiator
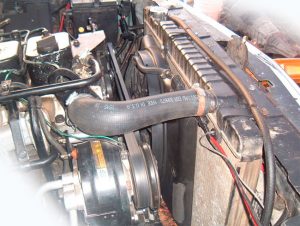
 Now that we’re free of the coolant, it’s time to disconnect the old radiator. Start by removing the three hoses: the upper and lower radiator hoses, and the one for the reservoir. To remove the clamps, use a screwdriver or pliers – whatever works best for you. Counterclockwise movements should loosen them enough for you to just remove the hoses without any resistance.
In some vehicles, there’s a transmission fluid cooler “sitting” inside of the radiator. It won’t be hard to notice: you’ll see thin metal lines stretching from the radiator to the transmission. Grab that wrench and disconnect the lines (there should be only two). This fluid also tends to leak; so, make sure to capture it all. It’s just as toxic and dangerous as the radiator coolant!
To avoid any issues with electricity, disconnect the fan motor electrical connector. Next, get to the air conditioner condenser. The wrench will help you remove the mounting bolts. Once you’re done with all of that, you can move on to the radiator. The bolts will probably resist a bit. Don’t rush it: unscrew them slowly. Before removing the radiator, make sure there isn’t anything holding it (hoses, wires, or connectors).
Step #3: Installing the New Radiator
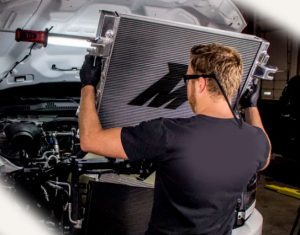 Wait, don’t throw away the old radiator just yet, as it might still have some parts that you’ll need. I’m talking about the fan shroud assembly, maybe some bolts, brackets, and wires. While most aftermarket radiators come with all this stuff, some packages don’t include any extras. So, just connect everything that I just mentioned to the new radiator. With that done, slowly lower the radiator into the exact same spot where the old one was.
There’s nothing hard about this part, except you need to be careful not to damage the fins. If you do accidentally bend them, just straighten them out so that the coolant is flowing through the radiator smoothly. The mounting brackets are the next step. Align the radiator properly and tighten the mounting bolts. Everything’s looking good? Excellent, then use the wrench to connect the air conditioning condenser.
If you’ve been following my guide closely, you must remember that the wiring harness follows. Mainly, it powers up the electric fan, but it all depends on your vehicle. The wrench will also help in connecting the transmission lines. Again, be very gentle not to bend them. Finally, connect the three hoses (two for the radiator, and one for the reservoir), and that’s it! Put the hose clamps back in and make sure the hoses are tight.
Step #4: Filling up the Coolant Tank
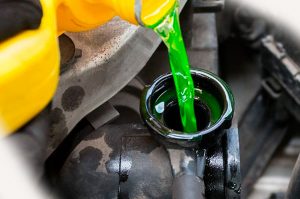 You do know that the new radiator will be useless without fresh coolant, right? But how do you know which kind you’ll need? For that, consult the owner’s manual (search for it online if you can’t find a physical copy) or get in contact with customer support. It’s very important to get the right antifreeze for the radiator. For the new coolant to be effective, I recommend diluting it with water.
The water needs to be distilled, and the concentration should be 50/50. Some drivers prefer to buy pre-diluted coolant, but in my opinion, it’s always better to do this on your own. First, fill up the radiator (stop only when you see it reaching the top). Next, pour the coolant into the reservoir – keep pouring until you see the cold fill line. This is important: after the first start of the engine with the new radiator, you might have to add some more coolant.
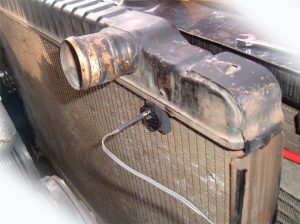
To complete the replacement routine, put the radiator cap back on. Without it, pressure won’t build inside of the radiator (that’s a bad thing). Alright, that’s pretty much it!
Add Comment