
The headlights on your Ford Super Duty are responsible for lighting the way ahead of you. If your lights are not working, it can be difficult to see and drive at night. However, if they’re dirty or foggy, then you’re putting yourself and other drivers in danger with a poor field of vision.
You can easily clean Ford Super Duty headlights by following a few simple steps. This article will teach you how to make your lights shine as brightly as they did when the car was new. Follow these instructions and you’ll have nothing but clear, bright vision for miles ahead!
 Step One: Remove the lens covers first, remove lens covers from both headlamps using a Phillips screwdriver or similar tool. You may need to use pliers if screws are stubborn. Be careful not to scratch surrounding paint with any of the tools used while taking off the lens cover; we want our finished product to be shiny and elegant!
Step Two: Clean your headlights with Dish Soap The next step in cleaning Ford Super Duty headlights is using dish soap or other gentle detergent on each headlight surface. Make sure that all dirt gets washed away before proceeding to the next part of this process. If there are any cracks in your lights’ plastic lenses, use an extra-absorbent cloth (like a paper towel) soaked in water instead of dish soap so you don’t accidentally make them worse by scrubbing too hard.
Step Three: Dry your headlights once both surfaces have been cleaned and dried, it’s time for the last step – polishing out the clear coat on your car’s lens covers with wax polish! Spread enough onto one side of a clean cloth to cover most of the surface of the lens. Use a circular motion to apply it evenly and then buff with another clean cloth until they shine!
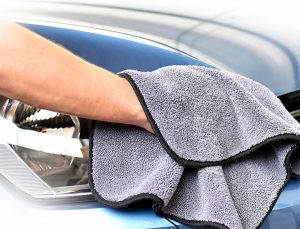 Once both surfaces have been cleaned and dried, it’s time for the last step – polishing out the clear coat on your car’s lens covers with wax polish! Spread enough onto one side of a clean cloth to cover most of the surface of the lens. Use a circular motion to apply it evenly and then buff with another clean cloth until they shine!
Step Four: Reattach lens covers now that your headlights are shiny again, reattach them by reversing Steps One through Three above. Make sure you don’t forget any screws or bolts; these parts can get lost easily in this process so make sure they’re all in place before calling your work finished!
Step Five: Look at your reflection as soon as both lights have been cleaned thoroughly, take one last look at how much brighter and clearer they became with just a little bit of effort! This will help other drivers see you coming and will keep them from running into your car.
If there are any cracks on the headlight’s plastic lens, use an extra-absorbent cloth (like a paper towel) soaked in water instead of dish soap so that you don’t accidentally make it worse by scrubbing too hard.
Summary
Be sure not to scratch paint when removing the lens cover with a driver or similar tool because we want our finished product to be shiny and elegant! Use dish soap on each headlight surface and then dry them afterward by using a clean cloth soaked in water if there are cracks present. Use wax polish before reattaching the lens covers for an even shinier finish! This process won’t take long and will be worth it in the end.
Add Comment