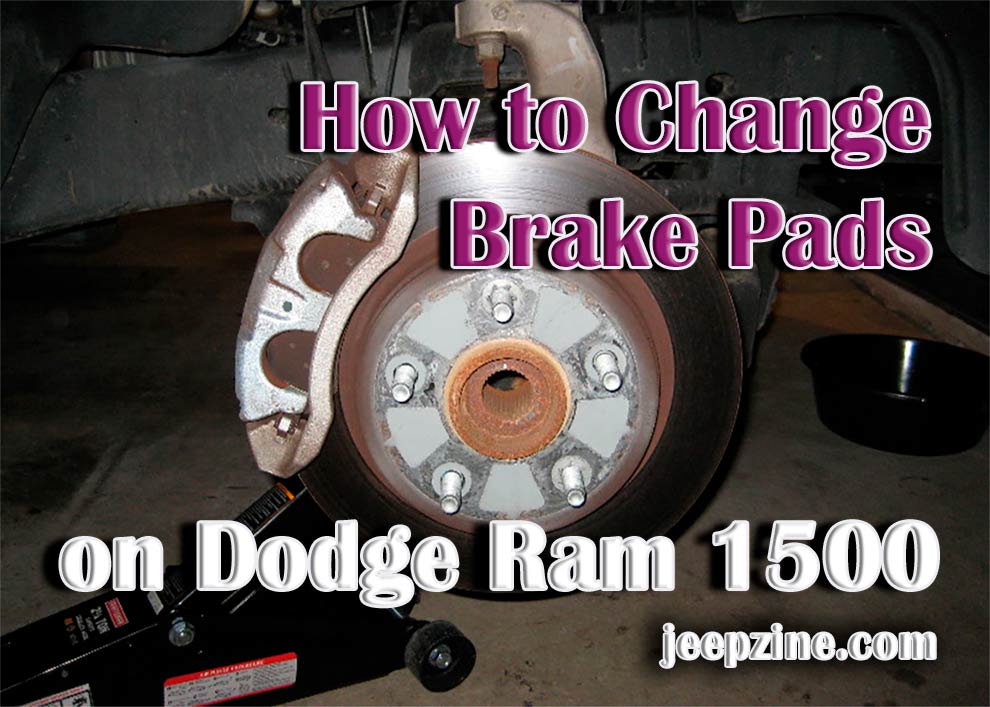
If you are a truck owner, then chances are likely that sooner or later the time will come when it is time to change your brake pads. After all, these parts wear out over time and need to be replaced with new ones on occasion. For those who own Dodge Ram 1500 trucks in particular, this article covers how you can change them yourself easily enough without having to go through an expensive mechanic for just one thing-changing your brake pads!
Step One: Prepare Your Tools Ahead of Time Beforehand
First things first before even beginning anything else-preparing your tools ahead of time by gathering together everything they may require for their work such as screwdrivers (both phillips and flathead), crescent wrenches, and more. You may even want to take a few pictures of the parts you will be removing for reference, just in case they happen to fall back into their spots while working on your truck.
 Step Two: Remove Rear Wheel Cylinders from Truck Bed
After getting everything together that is needed beforehand, it’s time to remove the wheel cylinders from the bed of your truck. This can typically be done by locating them behind each rear tire-they’ll essentially look like small metal caps attached solidly onto your vehicle with two bolts holding them in place at this point. The first step here is then loosening both bolts using whichever size socket wrench would work best for you (typically either a 16 or 17 mm). Once these are off, you should be able to remove the wheel cylinders themselves by unscrewing them from where they are in place.
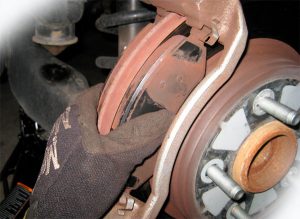
Step Three: Remove Brake Pads and Old Calipers
The next step is removing your brake pads as well as old calipers-these will need to be removed before installing new ones, of course! First, start with loosening up all four bolts that hold onto each caliper in its position on both the front and back brakes (usually 14 mm or 13mm). After this has been done for one side, use a screwdriver to pry it off gently so that there’s enough room left for sliding out the other end. Replace these parts if needed while also taking care not to let them fall down onto the ground-this will be problematic, as you’ll have to remove them again in order to install new ones.
Step Four: Install New Brake Pads and Calipers
Now that old brake pads and calipers are out of the way, it’s time to put on your new parts with this step! First up is installing a new set of brake pads onto both front brakes while remembering which side each one belongs on (they should say either “FR” or “RR”). Next come the calipers themselves; these need to be tightened fully so they don’t fall off easily–use an open end wrench for doing this job. The last thing remaining now are bolts-tighten these back into place using whichever size screwdriver you want to use (usually 12mm).
<!—->
Step Five: Repeat These Steps on the Other Brake Pad and Caliper Side
Finally, it’s time for finishing up by repeating these steps of removing old brake pads/calipers as well as installing new ones onto the other side. This is a fairly quick process since there are only two bolts to worry about loosening-simply do this with care before putting everything back into place according to where they belong. When done successfully, your brakes should be fully restored. For a comprehensive understanding on how to check brake pads, including recognizing signs of wear and ensuring your vehicle’s safety, also read our detailed guide.
Add Comment