The best thing about the famous air filters by K&N is their reusability. That’s right: you don’t have to buy a new filter every time the old one gets clogged. All you’ll have to do is clean it, and the filter will serve you for many years! Don’t worry: this is a rather simple and straightforward process. And if you follow my step-by-step guide closely, you’ll be done in no time!
A quick note before we move on to the actual cleaning: even if you have the best cold air intake for Dodge Ram, maintenance will still be necessary. On average, premium-quality filters last for up to 100K miles (which equals 6-7 years of driving). And once you clean, rinse, and oil it properly, the filter will look and perform like it’s brand-new!
Step #1: Cleaning
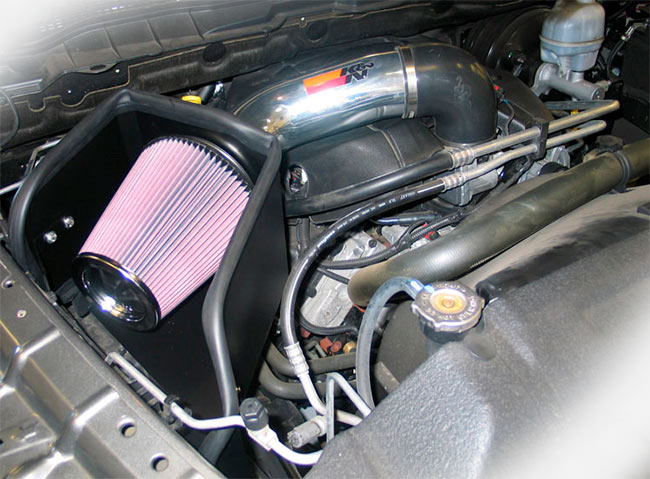
First things first, we need to remove the filter from the engine compartment. Pop the hood and you’ll instantly see the big, boxy intake tube housing. The filter is “hiding” right below it – there’s no missing it. There might be latches or clamps holding it together: disconnect them, and take the filter out. The K&N filters are almost always conical in shape. Now, how can you tell whether cleaning is in order, or not?
Pay attention to the folds on the filter. If they’re overwhelmed by dust/dirt/debris, that means we’re in business. I recommend shaking the filter a bit to get rid of some of the biggest chunks of dust. Be gentle, though, and don’t damage anything! A soft-bristled brush will be perfect for this. Next, you’ll need to use a cleaning solution to bring the filter back in shape.
<!—->
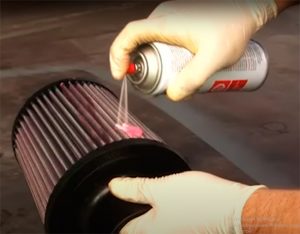
Most brands (including K&N) usually include a bottle of decent-quality cleaner. If you didn’t get any, they’re available for cheap online or at local stores. Make sure you spray both sides and also the inner surface of the filter. Let the cleaner do its thing for +/- ten minutes. Don’t leave it unattended for too long, though (it shouldn’t dry completely).
Step #2: Rinsing + Drying
Alright, with cleaning out of the way, let’s get to rinsing. Just turn your hose on, and keep the filter right beneath it for the water to seep through. Here’s how it works: the cleaner “loosens” the dirt buildup, while the water carries it all away. When you’re done, shake the filter once again to get rid of any water residue. Next, just let it rest for a while. And by “a while”, I mean give it a good six to eight hours.
 Remember: we want it to be 100% dry for the next stage. So, the most obvious thing to do would be to plan this so that you’re done with rinsing by the end of the day. And, you can let the filter dry overnight, while you’re sleeping. Make sure you don’t have to use the car early in the morning; otherwise, you’ll have to repeat steps #1 and #2 all over again.
Step #3: Oiling the Filter
And we’re finally ready to oil our K&N filter! Don’t overdo this: a thin coat of oil should do the trick. Again, most filters include a bottle of oil along with a cleaner solution. The oil usually comes in a spray can or a (squeezable) bottle. Each pleat needs to get its fair share of oil if you want to achieve the best results. Some of the most advanced oil brands have a slight dye (red, blue, or something else) that helps to see how much oil you’ve applied to each spot.
 To get rid of any excess oil on the edges, use a paper towel. I recommend doing this outside, in an open area. Let the oil stand for 15 to 20 minutes so that it achieves maximum efficiency. So, what does the oil do, exactly? First of all, it aids the filter in collecting dust and pollen. On top of that, it protects it from wear and deterioration. In other words, the filter will last longer and be more effective.
Ok, that’s about it! All that’s left to do now is put the filter back where it belongs, and start the engine. Remember the clamps and latches that we disengaged earlier? Well, go ahead and reattach them so that the filter is sitting properly and doesn’t shake or wobble. If you did everything right, a cleaned filter will last for up to 50K extra miles, saving you a lot of bucks on a replacement. Don’t forget to check on it every 15-25K miles, though!
Add Comment