
Many people are looking for ways to make their vehicles stand out from the rest. One of the easiest ways to do this is by installing halo headlights on Chevy Silverado. These lights will illuminate your path and increase visibility at night, making it easy for you to drive without having an accident. How to install halo headlights on Chevy Silverado is something that many people may want to know.
Tools Needed
Socket wrench, the type that is used for tightening bolts. It will usually be a “socket” with an opening at one end and a ratchet handle attached to the other. You can also use an electric drill attachment or torque screwdriver if you have it available.
Screwdrivers – Flathead (for removing old headlight assembly) and Phillips head (to take off front bumper). Do not forget your gloves!
Plastic push clips – These are plastic pieces that hold wires in place beneath the metal clip holding them down so they don’t move around when you’re taking apart components of the car’s wiring system. They come in different sizes depending on the size of the wire, and you can get them at your local auto-parts store.
Wire snips – These are a tool that is good to have around for cutting cables in general, but they also come in handy when using these clips because it is easier (and safer) than trying to cut through a cable with pliers or scissors.
Wrench – A socket wrench should be available on every car owner’s workbench for removing nuts/bolts from components like Chevy Silverado bumper assembly.
Step-by-step guide
1. Remove plastic push clips
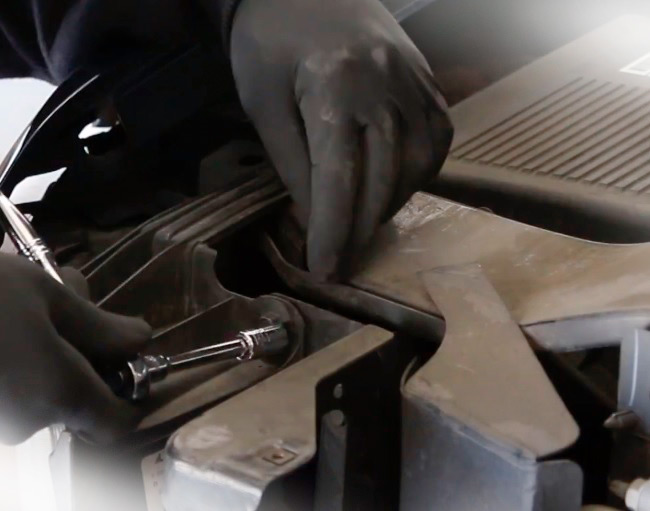
2. Remove 10mm bolts
3. Compress metal clips and pull outwards to free the grill
Compress metal clip and pull outwards to free grill. Now that our old headlights have been removed, we can move onto installing new halo headlights! The first thing we need to do is compress the metal clip found in front of both grills with one hand while using another hand or a flathead screwdriver tip – whichever works better for you – to pull the metal clip outwards.
Remove all wires attached via wire clips. This is the next step to removing your Chevy Silverado’s headlights, and it involves taking off all of the wires that are attached via wire clips behind each headlight assembly. When you do this, be sure to leave enough slack so there isn’t any pulling on a cable when disconnecting them from their attachment point because we don’t want to break anything (or hurt yourself!).
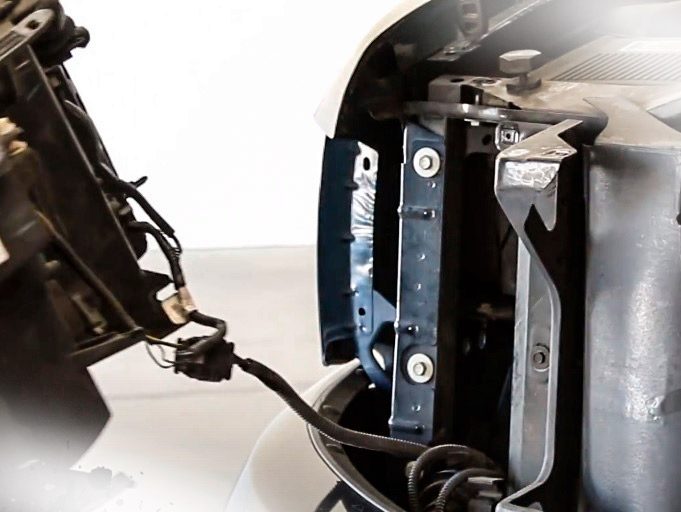
4. Remove 3 10mm bolts holding the headlight
Once you have disconnected all wires, removed headlight assembly, and pulled off the bumper cover, it is time to take off the old headlights! This step will require removing three bolts from each of your Chevy Silverado’s headlights, so be sure to use a wrench or electric drill attachment in order to remove them without any issues!
5. Remove the headlights
6. Connect new headlights
Connect new headlights. The final step for installing halo lights on this Chevrolet Silverado involves connecting both of those new halos onto your truck with an O-ring connector – also called a compression nut – which can be found at most auto parts stores! You’ll need two hands for this part because one will need to hold the headlight while the other attaches it with a wrench. The process is very similar to how we removed them in our previous step, but this time you should be tightening bolts instead of loosening them.
7. Reconnect all wires
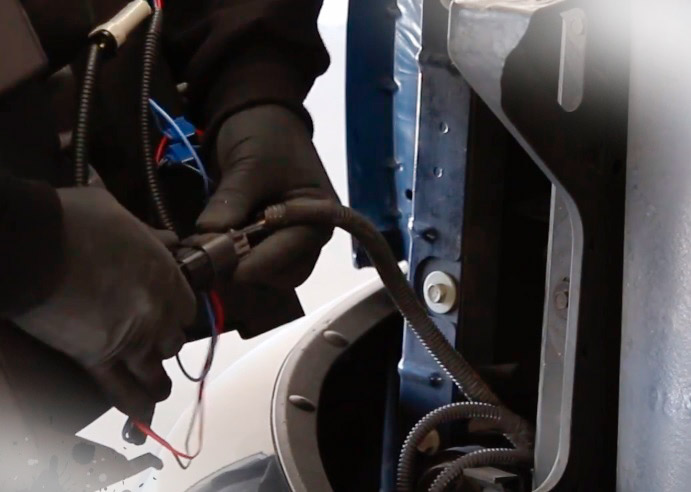 Reconnect all wires. Once both lights are securely connected and tightened down, then reconnect all wiring using plastic push clips in order to keep any cables from moving around without being held securely. That’s it! You have just successfully replaced your Chevy Silverado headlights and now can enjoy their sleek new look for years to come!
Add Comment