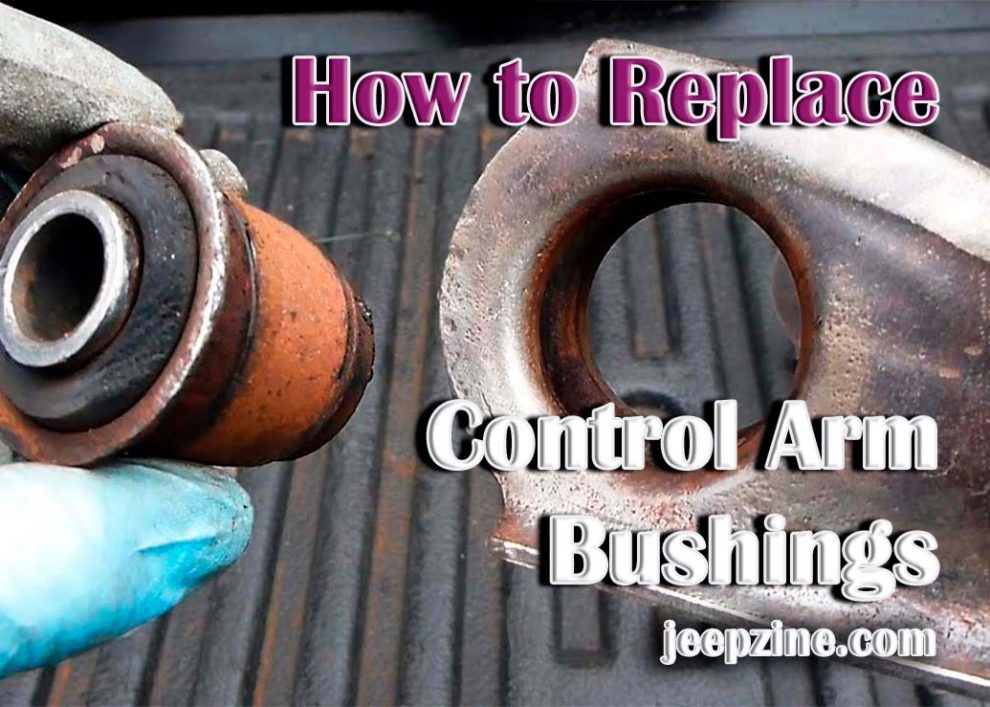
Control arm bushings, also known as suspension bushings, are an important part of your vehicle’s suspension system and help absorb and reduce road shock. They are designed to improve the overall handling performance and maintain the alignment of the wheels. Over time, however, control arm bushings can wear out due to age or lack of maintenance. It is important to replace control arm bushing before it fails as this can have serious consequences for the handling and stability of your vehicle.
Signs that You Need to Replace the Bushing
 The most obvious sign that you need to replace a control arm bushing is if you hear a knocking sound coming from underneath your car when driving over bumps or when turning corners. This noise usually indicates that the rubber material inside the bushing has become worn or brittle over time. If you lift your car with a jack and inspect the bushing closely you may also observe cracks in its surface which indicate further wear. Another sign that might suggest you need new bushings is if your car shows excessive body roll when cornering or if it pulls in one direction while driving on a straight road.
Tools and Materials Needed for Replacing the Bushing
Before you start replacing the bushing, you will need to gather the right tools and materials. You will need a jack, jack stands, a socket wrench set, a hammer, and an appropriate-sized pry bar. Additionally, you will need to purchase new control arm bushings from your local auto parts store.
Once you’ve gathered your tools, it’s crucial to consider the overall suspension performance. Upgrading the shocks on your vehicle can dramatically improve ride quality and control. We recommend reading our guide on the Best Shocks for Dodge Ram 1500 for better understanding and selection of high-quality suspension parts. This will ensure you’re not only fixing current issues but enhancing overall vehicle performance.
Steps for Replacing the Bushing
Replacing a bushing can vary depending on the specific application and type of bushing being replaced. However, there are general steps that can guide you through the process:
-
Lift your vehicle with a jack and secure it with jack stands before starting any work.
-
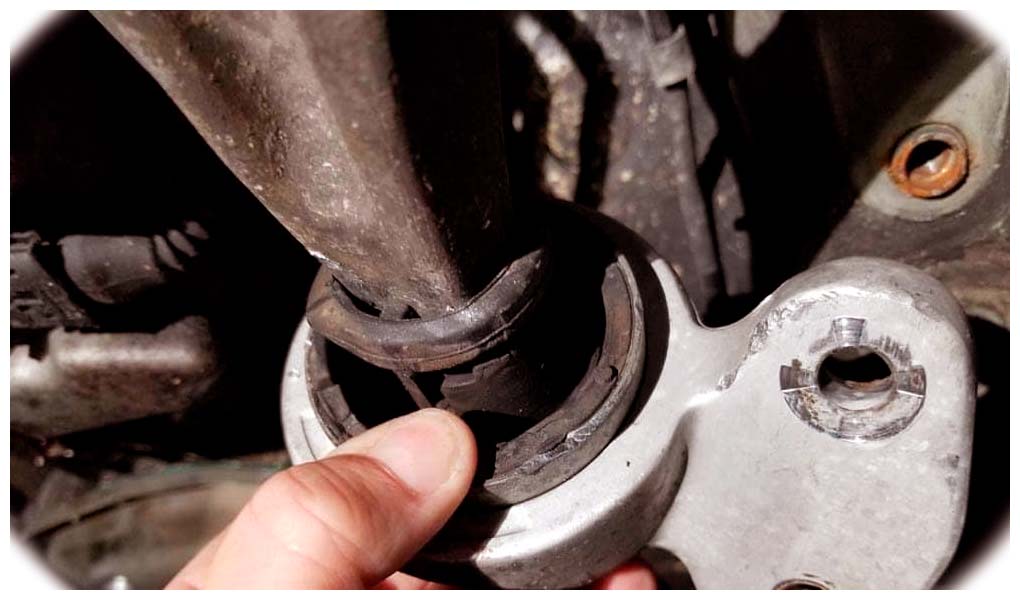
Locate the control arm bushing and use a socket wrench to remove the bolts that hold it in place.
-
Use a hammer and pry bar to separate the old bushing from the control arm.
-
Grease the inside of the new bushing with a high-temperature lubricant or grease before installing it onto the control arm.
-
Place the new bushing into position and use a socket wrench to tighten up all the bolts that hold it in place, making sure not to overtighten them as this could damage the metal components of your car’s suspension system.
-
Repeat steps 2 through 5 for any other bushings that need replacing on your vehicle.
-
Once you have finished replacing all the bushings, lower your car back down onto its wheels and test drive it for any signs of unusual noise or handling issues which may indicate further problems with your suspension system or alignment issues due to poor installation of bushings or other components during this process.
<!—->
Conclusion
Replacing control arm bushings in your vehicle can be a time-consuming and challenging process, but with the right tools and materials, it is possible to do it yourself. This guide has provided detailed steps on how to replace control arm bushings in your vehicle so that you can save money by doing it yourself. Be sure to take extra care when lifting and lowering the car to ensure safe operation.
Add Comment